Learn the essential technique for how to make chocolate covered strawberries. It’s perfect for Valentine’s Day or other romantic occasions! Just dip the berries in dark, milk, or white chocolate and then decorate with your favorite toppings.

Jessica’s Recipe Science
- Moisture interferes with melted chocolate. Drying the strawberries prevents the cocoa butter and sugar from clumping and seizing.
- Using a double boiler applies gentle, indirect heat, keeping the chocolate below scorching temperatures so it doesn’t burn.
- Letting the dipped strawberries set at room temperature allows the cocoa butter to crystallize for a glossy coating with a clean snap.
Featured Comment 2
“You really helped me out in my project! Thanks a lot for writing such a helpful and useful article on how to make chocolate covered strawberries. Thanks once again!”—Samania M.
Why It Works
Chocolate-dipped strawberries are a romantic dessert you can make in just minutes to share with your loved ones. The best part, it’s fun to customize to your liking. Keep it simple, or add crunchy nuts, sprinkles, or contrasting colors. I’ll share with you some essential tips to ensure a stunning fruit that stays fresh and looks beautiful when you’re ready to serve.
You only need a few ingredients to make perfect chocolate covered strawberries, but proper preparation makes all the difference. While there are several ways for how to melt chocolate, I prefer the double-boiler method for even melting and better control. Once the chocolate is smooth and glossy, dip each strawberry. The result is a beautifully crisp chocolate shell that snaps when you bite in, revealing a juicy, fresh strawberry inside. Simple, elegant, and always impressive!
Jump To a Section
Ingredients You’ll Need
- Strawberries: Use fresh, ripe strawberries. You can use either regular or large strawberries, with or without stems, for an elegant presentation.
- Chocolate: There are a few different types of chocolate for dipping, but I find compound chocolate creates a smooth, quick-drying coating. I prefer Guittard A’Peels or Ghirardelli melting wafers. Choose dark chocolate, semi-sweet, milk chocolate, or vanilla. These large, round discs are specifically used for dipping chocolate and provide a nice, clean surface once they solidify at room temperature.
See the recipe card below for all ingredients and measurements (US and metric).
Ingredient Substitutions
This chocolate covered strawberries recipe is easy to customize! Try these delicious options:
- Using Baking Chocolate Chips: Refrigerate the strawberries after dipping to help the coating harden. Alternatively, add ¼ cup of coconut oil to 1 cup of chocolate chips. Adding coconut oil thins the chocolate for easier dipping and helps it set smoothly as the oil solidifies at room temperature. I do this for my homemade magic shell and chocolate covered bananas.
- Using Couverture Chocolate: If you plan to use more high-quality, pricey couverture chocolate like the professionals, make sure you take the time to temper it properly.
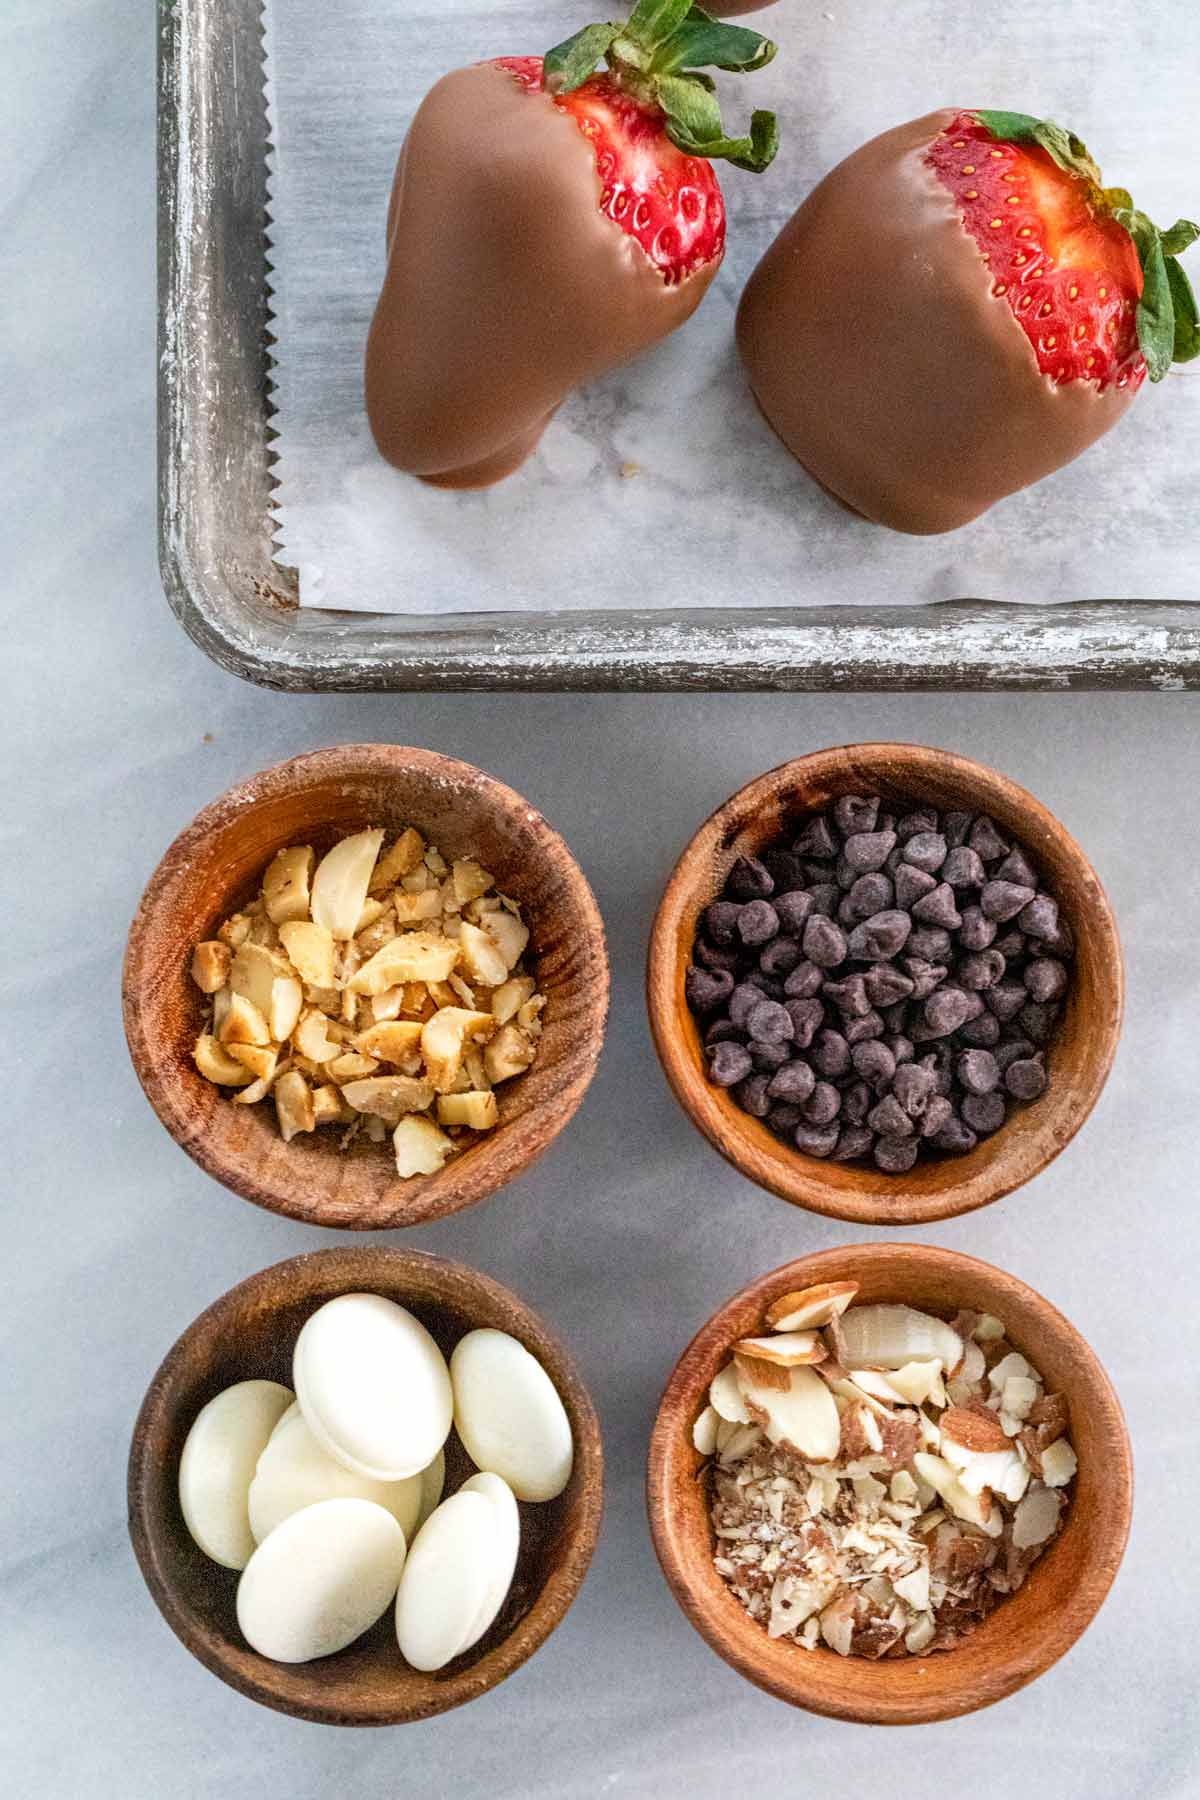
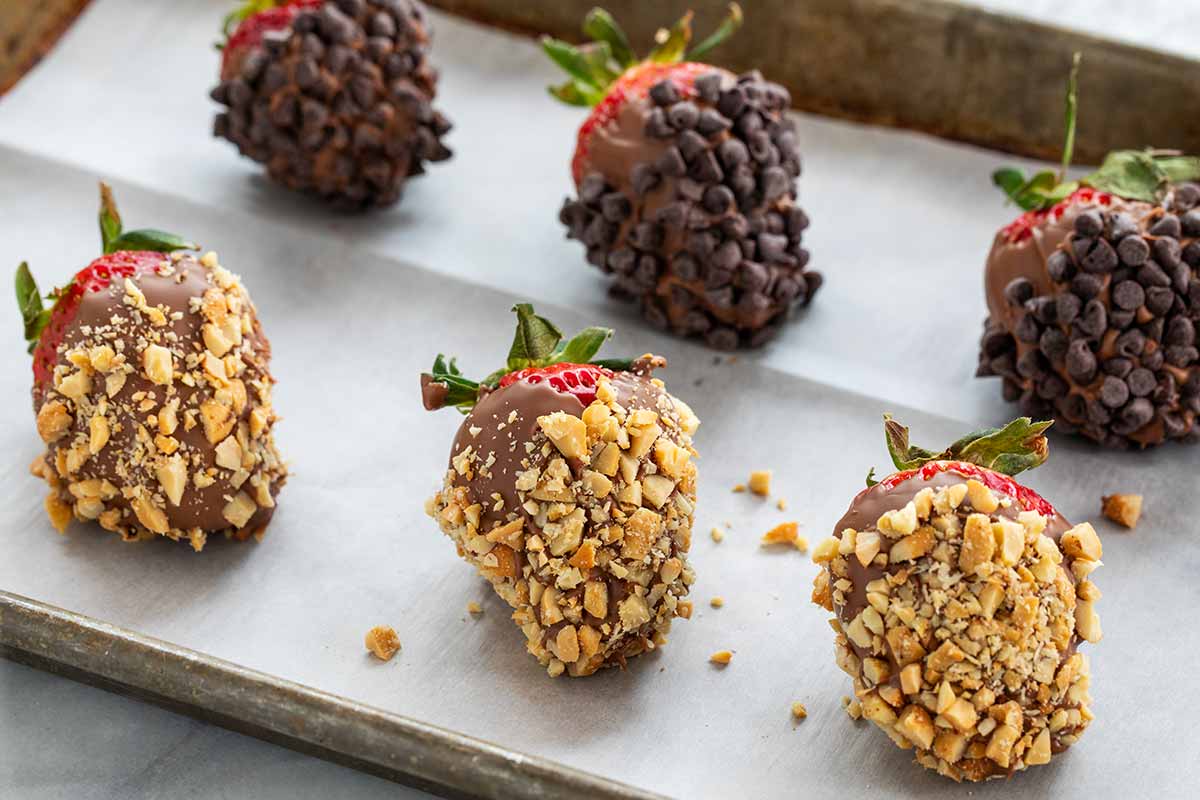
- Nuts: Add chopped nuts like peanuts, almonds, pecans, cashews, or a mix.
- Sweet Toppings: Add colorful sprinkles, edible confetti, sanding sugar, mini chocolate chips, crushed candy canes, toffee, cookies, graham crackers, or drizzle with different-colored melted chocolate.
- Food Coloring: Color melted white chocolate with gel food coloring for a concentrated hue. Liquid food coloring can be used, but it will make the chocolate runnier and less vibrant.
How to Make Chocolate Covered Strawberries
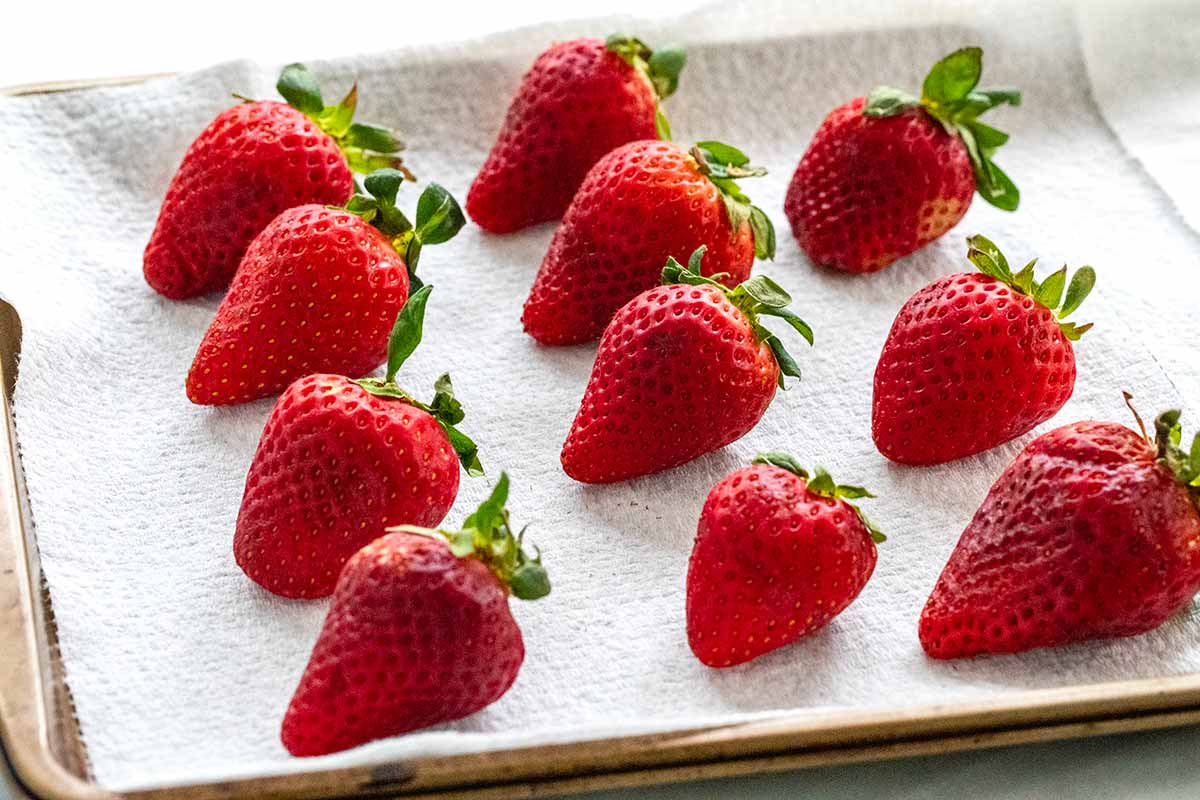
Step 1: Rinse and Dry the Strawberries
Make sure to wash the strawberries first and dry them well. I recommend placing the cleaned fruit on a sheet pan lined with paper towels to dry further in the refrigerator. The cool, dry air inside will help remove residual moisture from the berries as you prepare the chocolate.
Pro Tip: Chilled strawberries will cause the coating to dry much faster than room-temperature berries. If you plan on adding other toppings to the chocolate, make sure to factor that in.
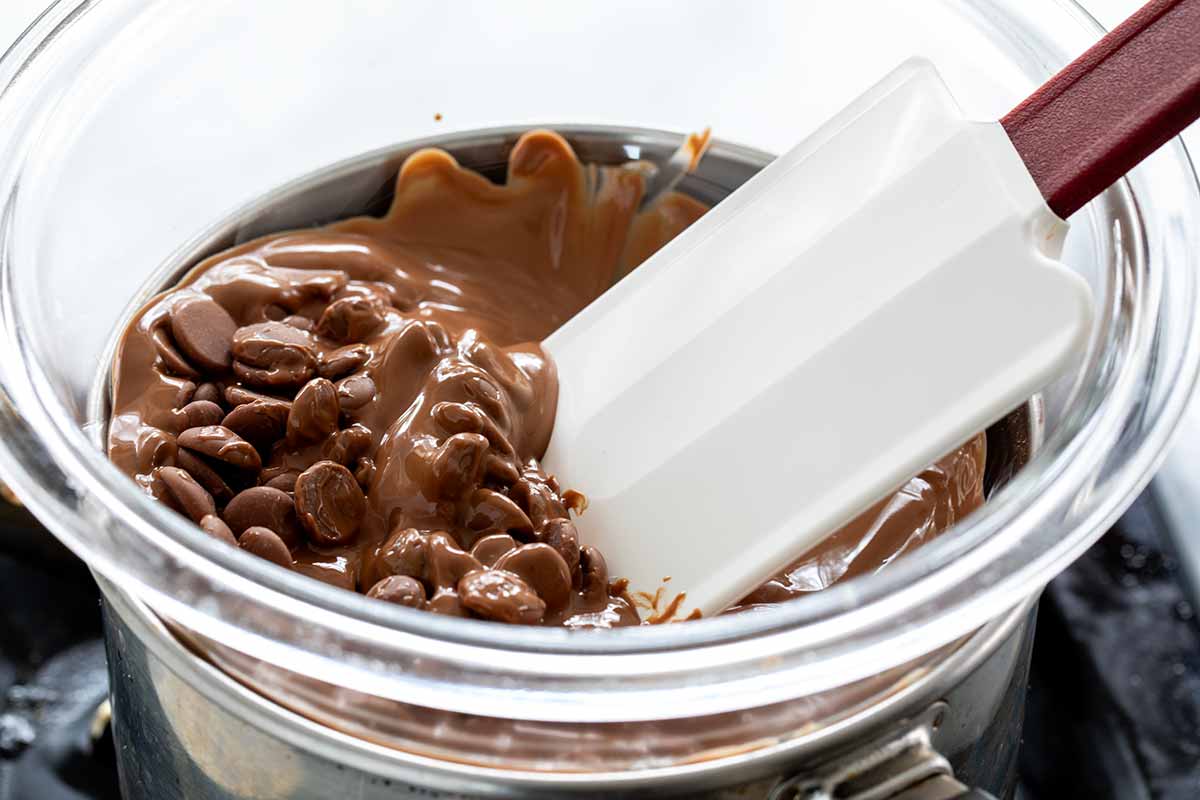
Step 2: Melt the Dark Chocolate
To melt compound chocolate, add it to a heatproof glass or metal bowl. Place it on top of a smaller pot that’s filled with water. The bowl filled with chocolate should not come into contact with the water.
Set the stovetop to low heat to create a gentle simmer. This method is called a double boiler. The water should not exceed 140ºF (60ºC), or the chocolate can burn and lose flavor. Stir until completely melted, then remove from the heat source immediately.
Microwave Method: Use a glass bowl and microwave the chocolate on 50% power at 15- to 30-second intervals until thoroughly melted.
Step 3: Melt the White Chocolate
To make these chocolate-covered strawberries a little more festive, I use Wilton gel food color to create a pink coating with the vanilla-flavored wafers. During the melting process, I add a little gel until the desired color is reached.
Experimentation Encouraged: When the chocolate hardens, you can also brush edible gold luster dust onto the surface for a shiny, glitzy appearance.
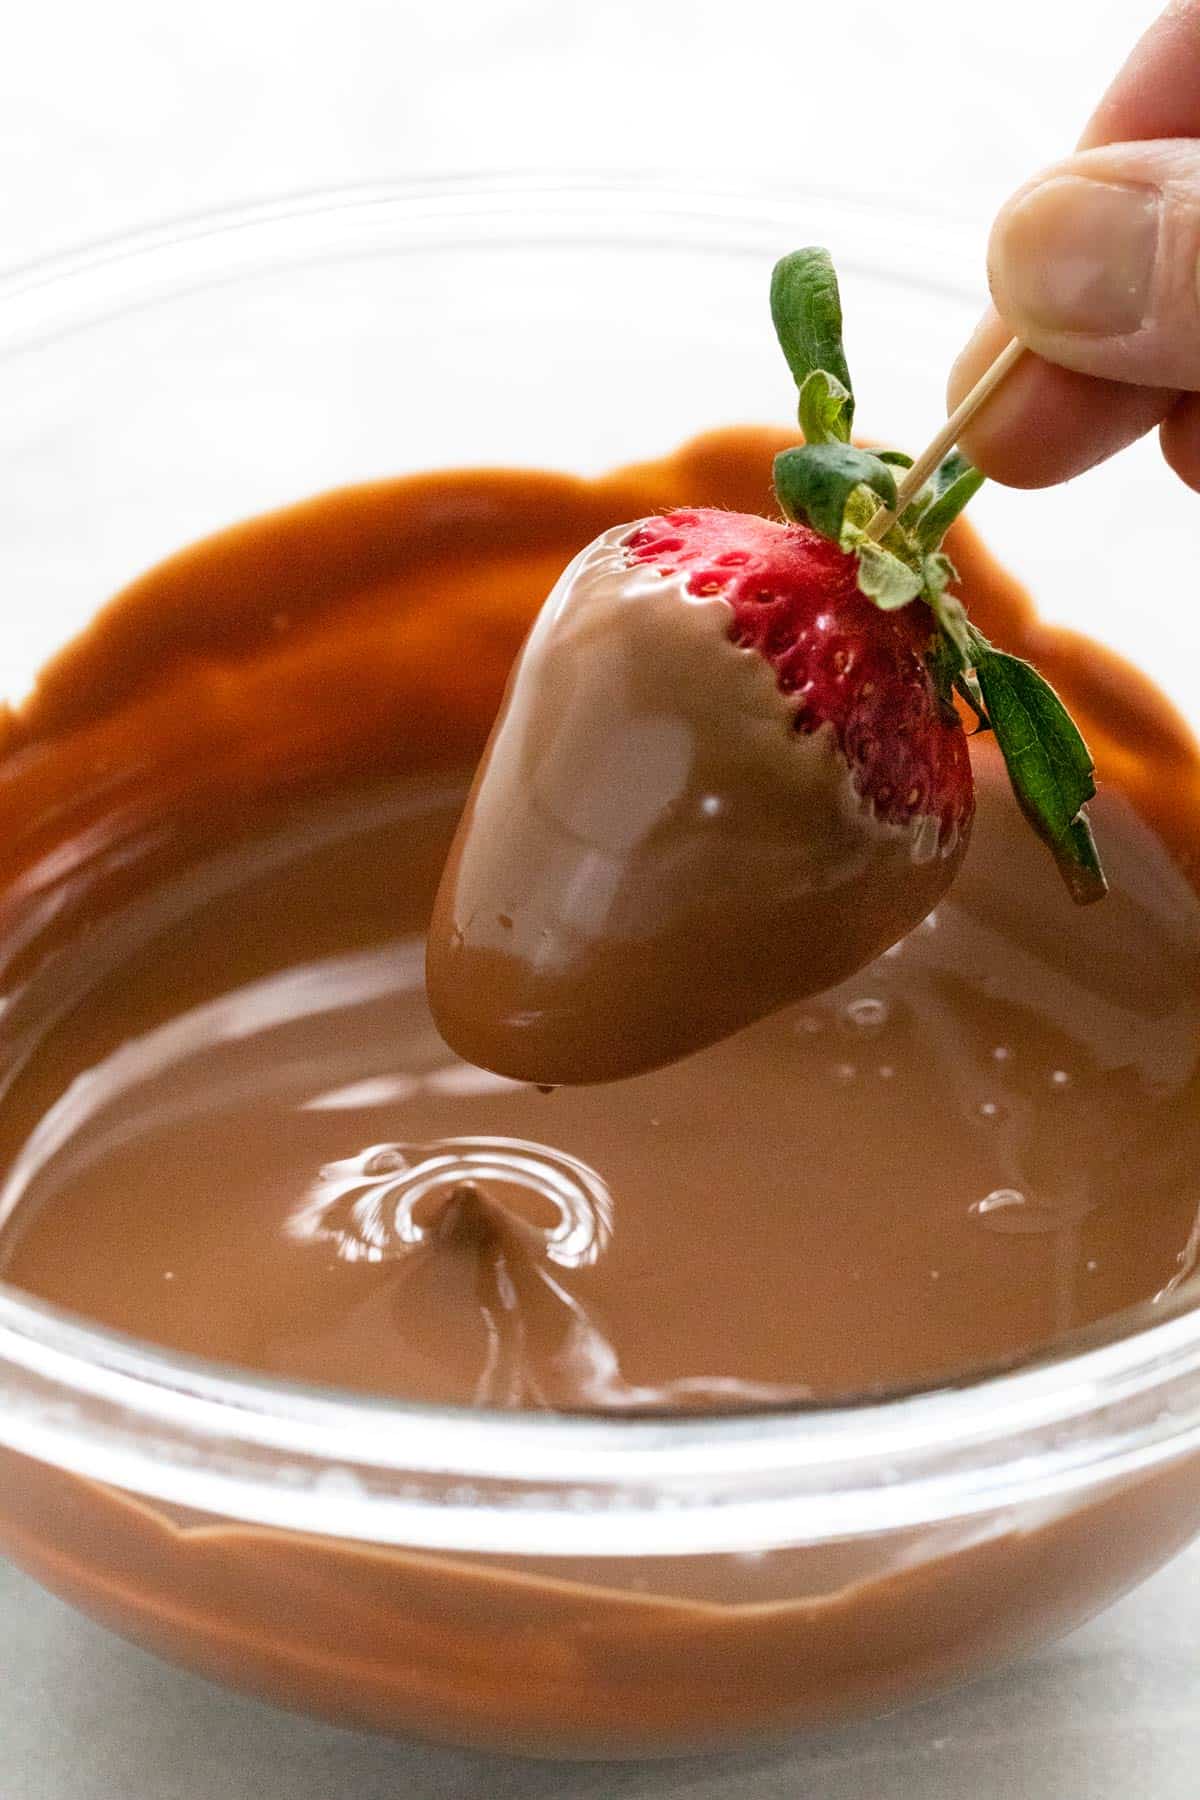
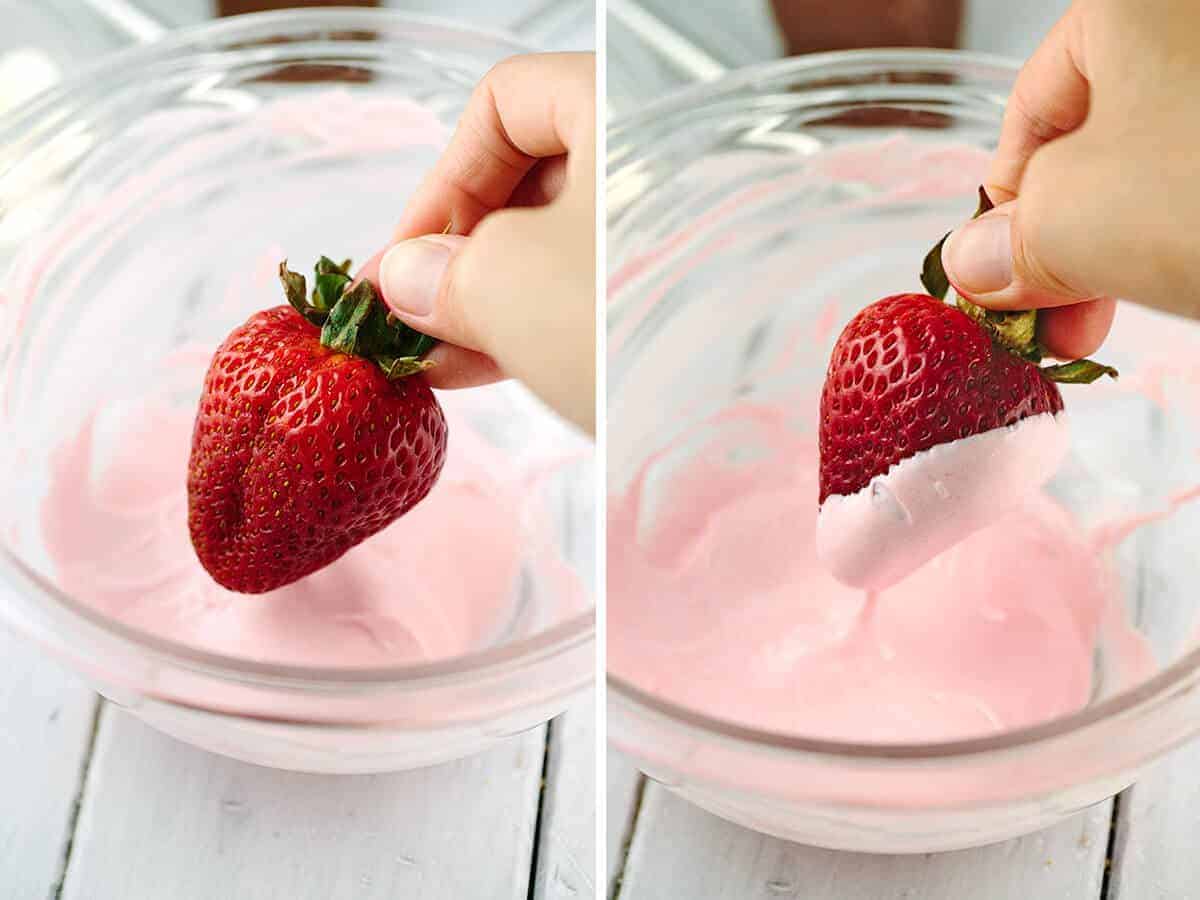
Step 4: Dip the Strawberries
If the green leafy stems are short or hard to grip, insert a toothpick into the top of each strawberry to make dipping easier and more controlled. You can add two toothpicks to help prevent them from spinning. Dip each strawberry and gently shake off any excess coating. Transfer to a baking sheet lined with parchment or wax paper.
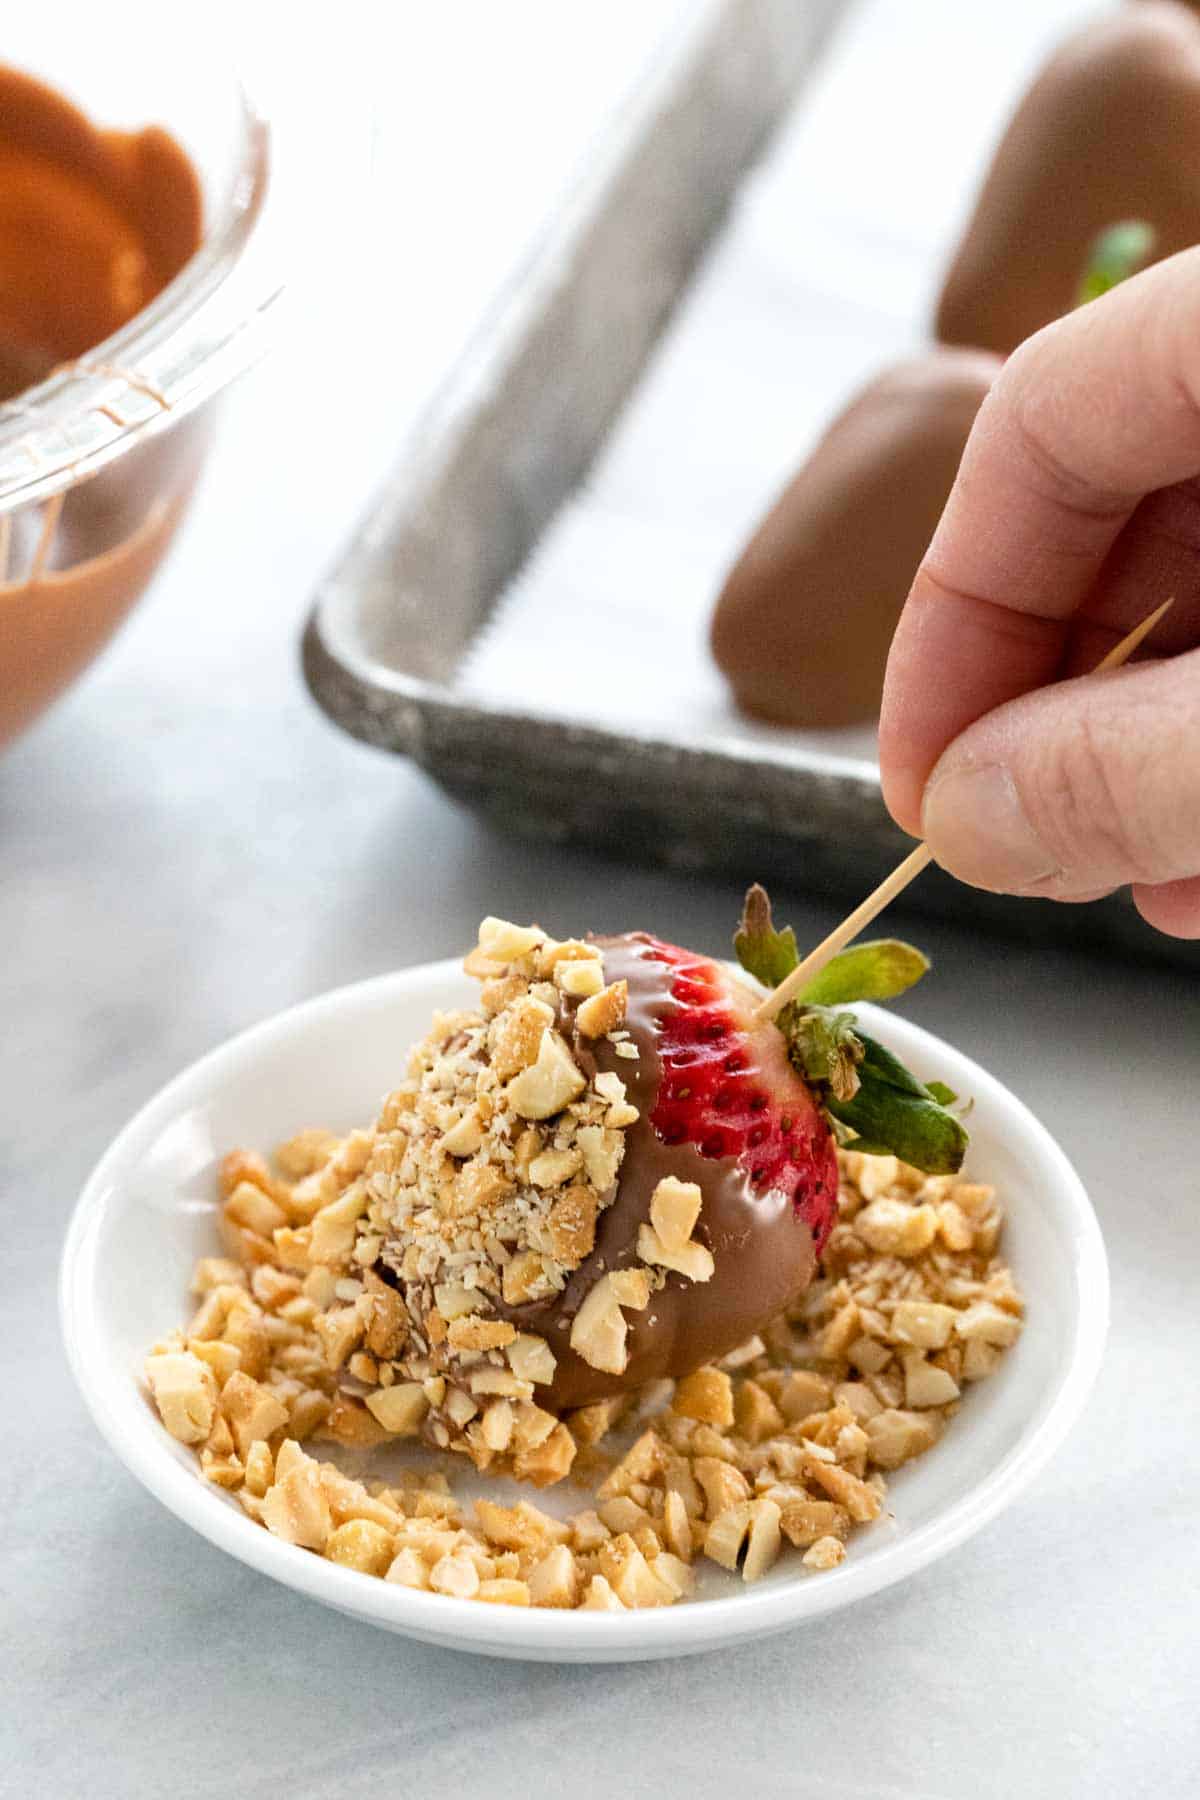
If desired, before the chocolate hardens, quickly add extra toppings, such as sprinkles or chopped nuts. Wait until after the chocolate has completely hardened before removing the toothpicks. I learned the hard way and made a mess!
Tips for Perfect Execution: If double-dipping with two types of chocolate or drizzling, wait until the first coat has completely dried before applying the second coating.
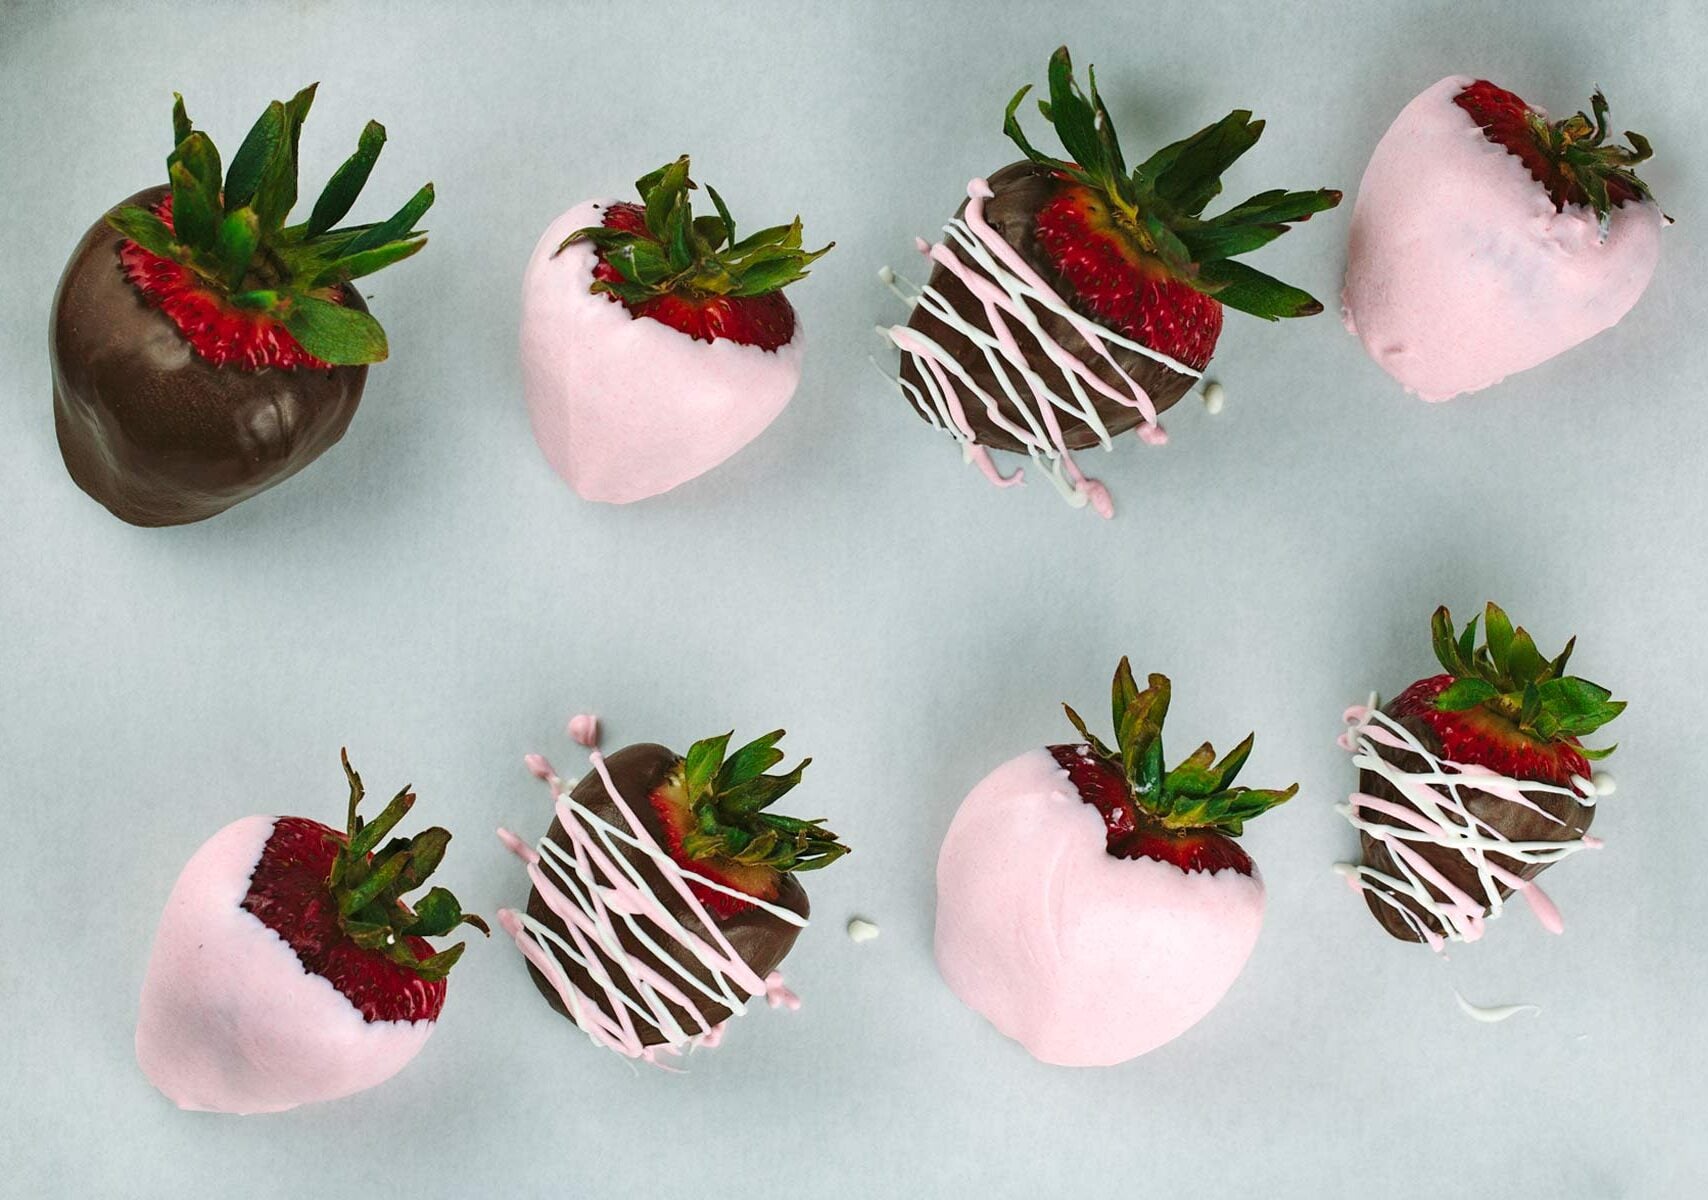
Step 5: For the Drizzle Look (Optional)
Wait until the chocolate coating hardens before adding the chocolate drizzle. Transfer melted chocolate to a small bag, then make a small cut in the corner. This allows for controlled, thin streams, which cool and set quickly due to their small surface area.
Step 6: Let them Dry
Let the strawberries rest at room temperature so the cocoa butter can crystallize evenly, allowing the chocolate to set smoothly and firmly.
Serving Tip: If dipping and serving the same day, the strawberries can be kept at room temperature for up to 8 hours for a softer bite, or refrigerated for a firmer texture. For best results, let refrigerated strawberries sit at room temperature for 15 to 30 minutes before serving.
Frequently Asked Questions
Look for labels calling out names like melting wafers, A’Peels, or candy coating. When melted, they do not require tempering to harden at room temperature. What makes the chocolate coating set is hydrogenated palm kernel oil, which helps the chocolate stay solid at room temperature once cooled.
The best way to store chocolate-covered strawberries is in the refrigerator, uncovered, for up to 2 to 3 days for maximum freshness. The chocolate coating tends to sweat on the surface when covered in the fridge due to condensation. Note that certain candy or cookie toppings may get sticky or become damp if stored for over 24 hours.
Yes, chocolate covered strawberries can be frozen. Place them on a parchment paper-lined sheet pan in a single layer. Freeze for 3 to 4 hours or until solid. Transfer to an airtight container and freeze for up to 1 month. Defrost in the refrigerator for 1 hour. Do not let them thaw completely, or they will be mushy.
If you notice the strawberries leaking a bit of red juice after a day or two, that’s typically from damaged spots on the fruit that were cut or bruised. Over time, the water in the ruptured cell walls of the berries interacts with the sugar in the chocolate, and the berries expel moisture by osmosis.
More Sweet Recipes


If you tried these Chocolate Covered Strawberries, please leave a 🌟 star rating and let me know how it went in the 📝 comments below!
Chocolate Covered Strawberries

Ingredients
- 12 large strawberries
- 1 cup dark or milk chocolate , Ghirardelli Melting Wafers
- 1 cup white chocolate , Ghirardelli Melting Wafers
- gel food coloring, optional
- 1 cup chopped nuts, mini chocolate chips, or sprinkles for topping (optional)
Instructions
- Rinse and Dry the Strawberries – Wash with cold water and thoroughly dry each strawberry. Place them on a paper towel-lined baking sheet and chill in the refrigerator until ready to dip.
- Melt the Dark Chocolate – Place the dark chocolate in a clean, dry heatproof bowl (glass or aluminum). Set the bowl over a small pot of barely simmering water, making sure the bowl does not touch the water, and the temperature stays below 140°F (60°C). Gently stir with a rubber spatula until fully melted and smooth, avoiding air bubbles. Remove from the heat once melted.
- Melt the White Chocolate – Repeat the melting process with the white chocolate using a clean bowl. If coloring, remove the bowl from the heat and add a small amount of gel coloring, stirring and adjusting the color until the desired color of is reached.
- Dip the Strawberries – If needed, insert a toothpick into the top of each strawberry to make dipping easier. Line a large sheet pan with parchment or wax paper. Dip each strawberry into the melted chocolate, gently shaking off any excess back into the bowl. If adding toppings, immediately apply while the chocolate is still wet. Place the coated strawberries onto the prepared sheet pan.
- For the Drizzle Look (Optional) – Let the chocolate coating on the strawberries set first. Transfer some of the melted chocolate to a small resealable bag, cut a small corner, and pipe thin lines over the berries. Let the drizzle dry completely before serving or storing.
- Let them Dry – Do not move the berries until set. Remove toothpicks (if using) once the chocolate has hardened.
Notes
- Using Compound Chocolates: If using Guittard A’Peels or Ghirardelli melting wafers, the chocolate coating will harden at room temperature once cooled.
- Using Chocolate Baking Chips: For non-tempered chocolate, refrigerate the dipped strawberries to harden the surface. Alternatively, add ¼ cup of coconut oil to 1 cup of chocolate chips to help the chocolate set at room temperature.
- Serving: Once completely set, serve the same day within 8 hours.
- Storing: Refrigerate uncovered for 2 to 3 days. Bring to room temperature for 15 minutes before serving.
- Freezing: Freeze on a parchment paper-lined sheet pan for 3 to 4 hours or until solid. Store in an airtight container for up to 1 month. Defrost in the refrigerator for 1 hour.
Nutrition Facts
Percent Daily Values are based on a 2000-calorie diet. All nutritional information is based on estimated third-party calculations. Each recipe and nutritional value will vary depending on the brands you use, measuring methods, and portion sizes per household.


samania malik says
You really helped me out in my project! Thanks a lot for writing such a helpful and useful article on how to make chocolate covered strawberries. Thanks once again!
Jessica Gavin says
I’m so happy that I could help you with your project!