
This delicious ham and cheese quiche recipe is made with a flaky homemade pie crust. It’s perfect for sharing with family for brunch or meal prep for the week.

Jessica’s Recipe Science
- Blind-bake the crust to set the flour proteins, prevent shrinkage, and create a dry barrier to prevent a soggy bottom.
- Use heavy cream and whole milk, with 2 eggs per cup (plus an extra yolk), for a smooth custard that holds its shape.
- Baking at 375°F gently sets the egg proteins. Cooking until the center reaches 185°F keeps the custard tender and sliceable.
Why It Works
My ham and cheese quiche recipe is a flavorful, savory pie that makes breakfast time more enjoyable. This version is entirely from scratch, but I share plenty of make-ahead tips and substitutions to simplify preparation. I love making this recipe with leftover ham, especially after the holidays. If you’re looking for a low-carb option, try my crustless ham and cheese quiche.
For a sturdy yet flaky base, I use my homemade pie crust. I whip it together in my stand mixer, then chill it for easier rolling. You need to par-bake it before filling it with savory cubes of meat, cheese, and green onions. The smooth custard goes into the shell, then bake until the eggs firm up, yielding gorgeous golden slices.
Jump To a Section
Ingredients You’ll Need
- Pie Crust: I use a classic savory pie crust recipe called Pâte Brisée. All you need is flour, butter, salt, sugar, and water. A store-bought refrigerated or frozen pie shell can be used.
- Pork: I like to use ham steak cut into ¼-inch cubes. This variety adds a burst of flavor and prevents the heavier pieces from sinking to the bottom.
- Custard: A mixture of whole eggs, yolk, heavy cream, salt, pepper, and nutmeg.
- Cheese: To add depth to the filling, use an aged cheese such as sharp cheddar. This shredded, low-moisture variety melts easily and infuses the egg custard with flavor.
- Herbs: Sliced green onions or chives add a delicate allium flavor to the custard filling.
See the recipe card below for all ingredients and measurements (US and metric).
Ingredient Substitutions
This easy ham and cheese quiche recipe is easy to customize! Try these tasty options:
- Pork Options: Use crispy bacon, cooked mild or hot sausage, Canadian bacon, pancetta, or prosciutto. I also like to use leftover honey glazed ham or crock pot ham.
- Other Meats to Add: Diced chicken, ground turkey or chicken, or ground beef.
- Cheese Swaps: Try Swiss, mozzarella, Monterey Jack, or gruyere cheese, often used in quiche lorraine. Add parmesan for nuttiness or a mixture.
- Vegetables: Add veggies like minced garlic, roasted bell peppers, caramelized onions, sundried tomatoes, artichokes, spinach, or kale. Cook any high-moisture ingredients, such as mushrooms, broccoli, or zucchini, before adding them.
- Dairy Swaps: You can use half-and-half as a substitute.
- Herbs: Add thyme, basil, oregano, rosemary, dill, chives, or tarragon.
How to Make Ham and Cheese Quiche
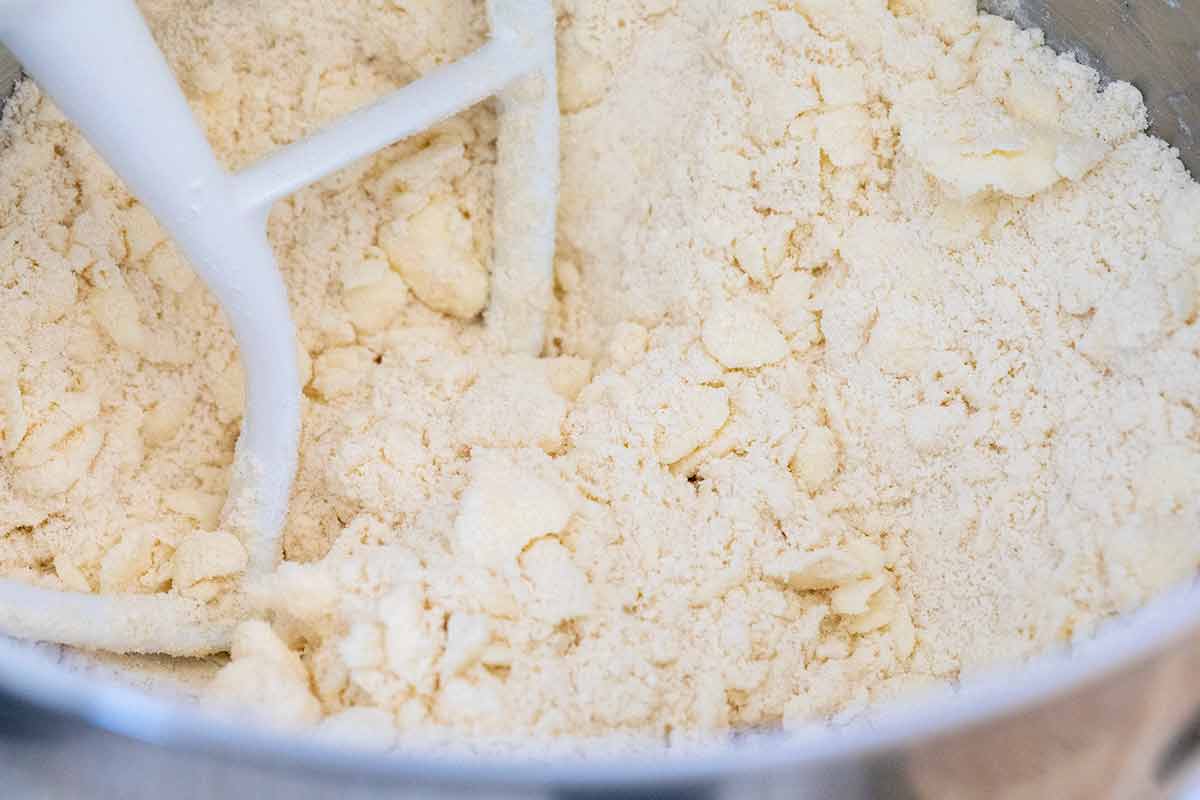
Step 1: Break Down the Butter
My dough has a higher butter ratio, which reduces gluten formation, resulting in a light, flaky crust. My stand mixer swiftly breaks down the fat into pea-sized pieces in less than two minutes compared to using your fingers. A dough cutter works well, too.
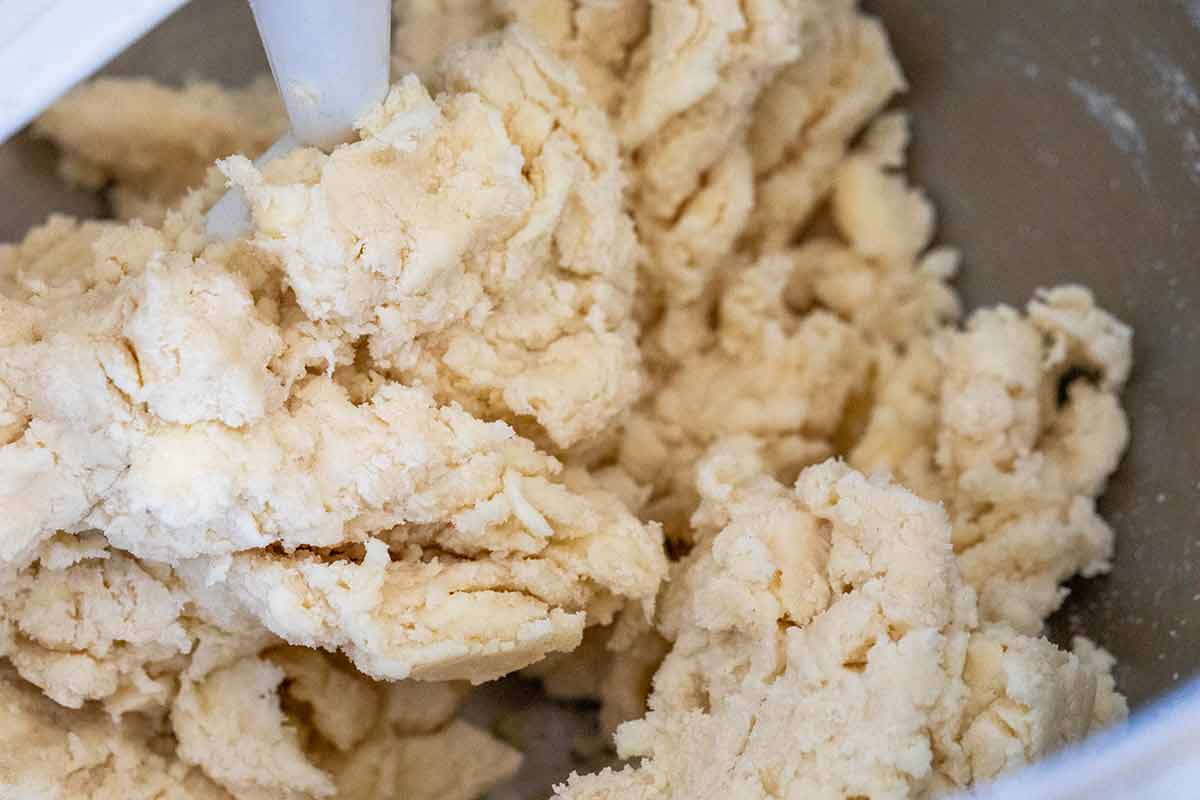
Step 2: Hydrate the Dough
Gradually add the ice water, 1 tablespoon at a time, mixing in between. The mixture should resemble modeling clay.

Step 3: Rest the Dough
The dough comes together rather quickly. Form it into a 1-inch-thick disc, then tightly wrap it in plastic. This makes it much easier to roll later. Rest and chill it for at least 4 hours. The aggressive mixing process makes the flour proteins elastic, so resting allows them to relax, making the dough easier to roll.
Pro Tip: If you can, I recommend making the dough the day before, as it will save you a lot of wait time the day you’re ready to bake.
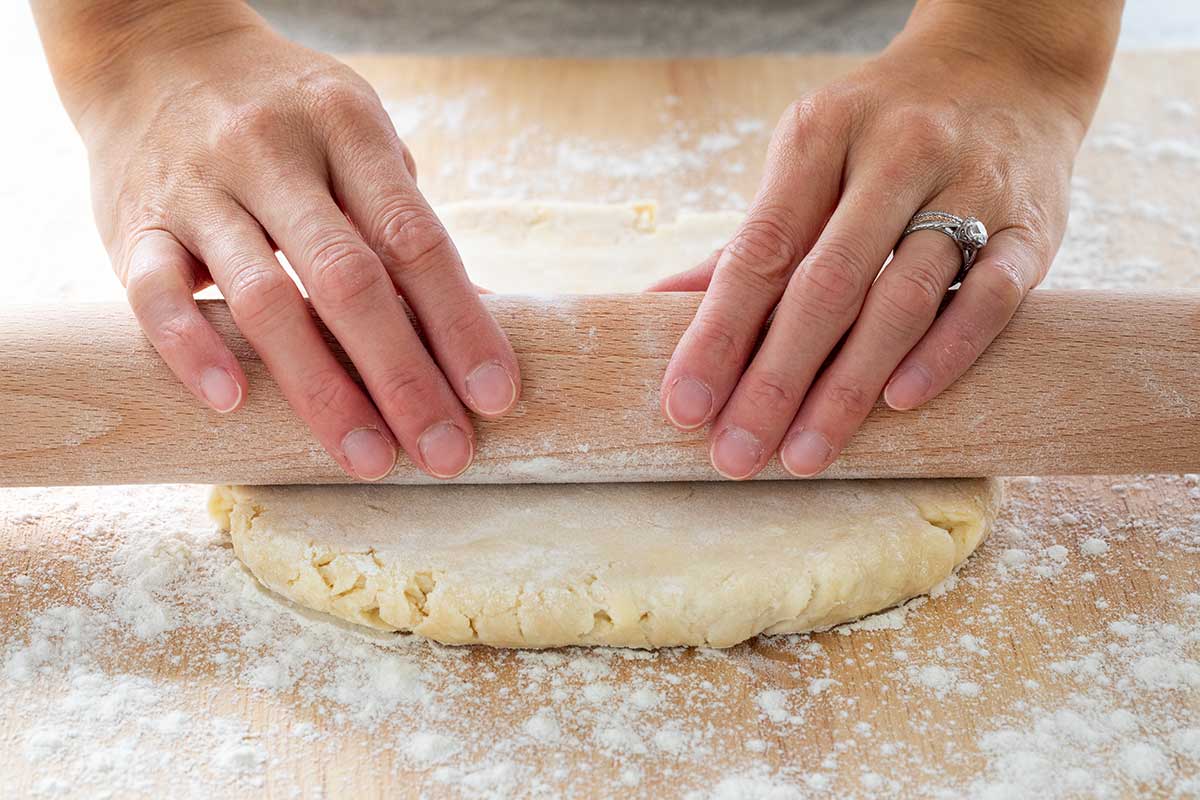
Step 4: Roll the Dough
Remove the dough from the fridge and let it sit at room temperature for about 10 minutes. I find that rolling out the pie dough to about ⅛-inch thickness yields a sturdy crust with the proper dough-to-filling ratio.
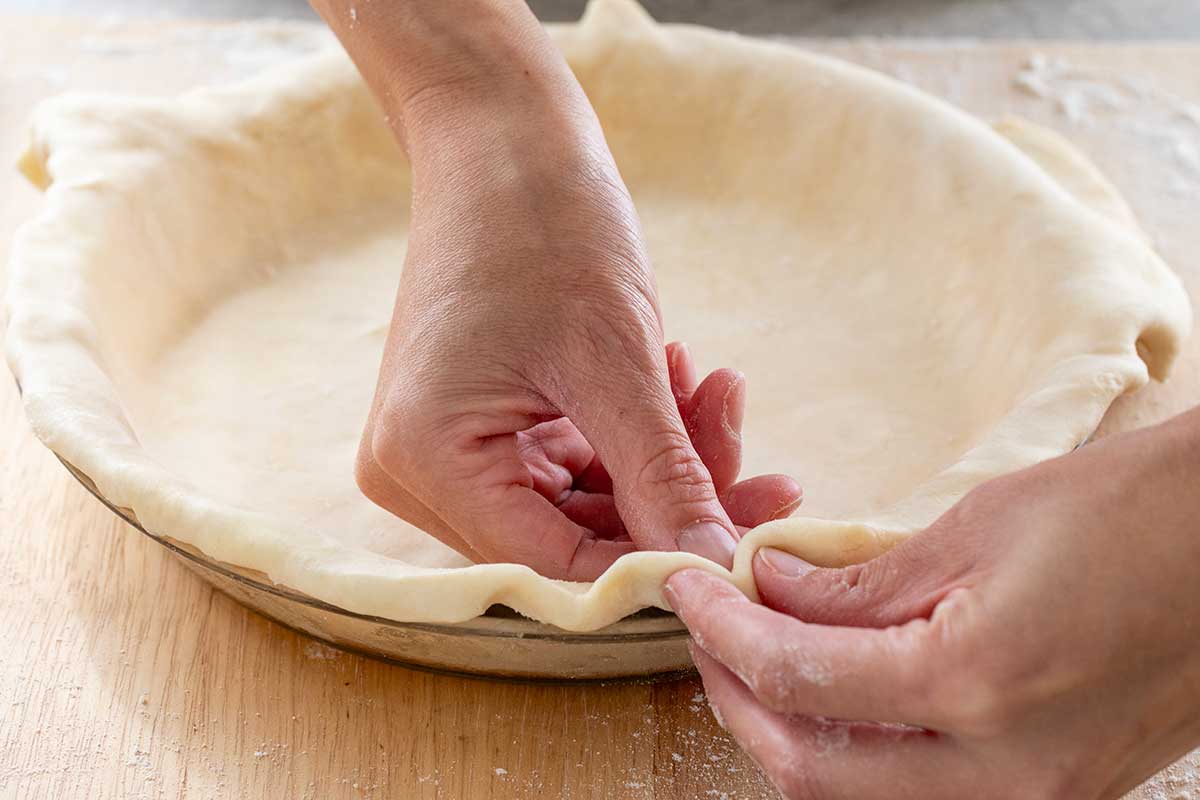
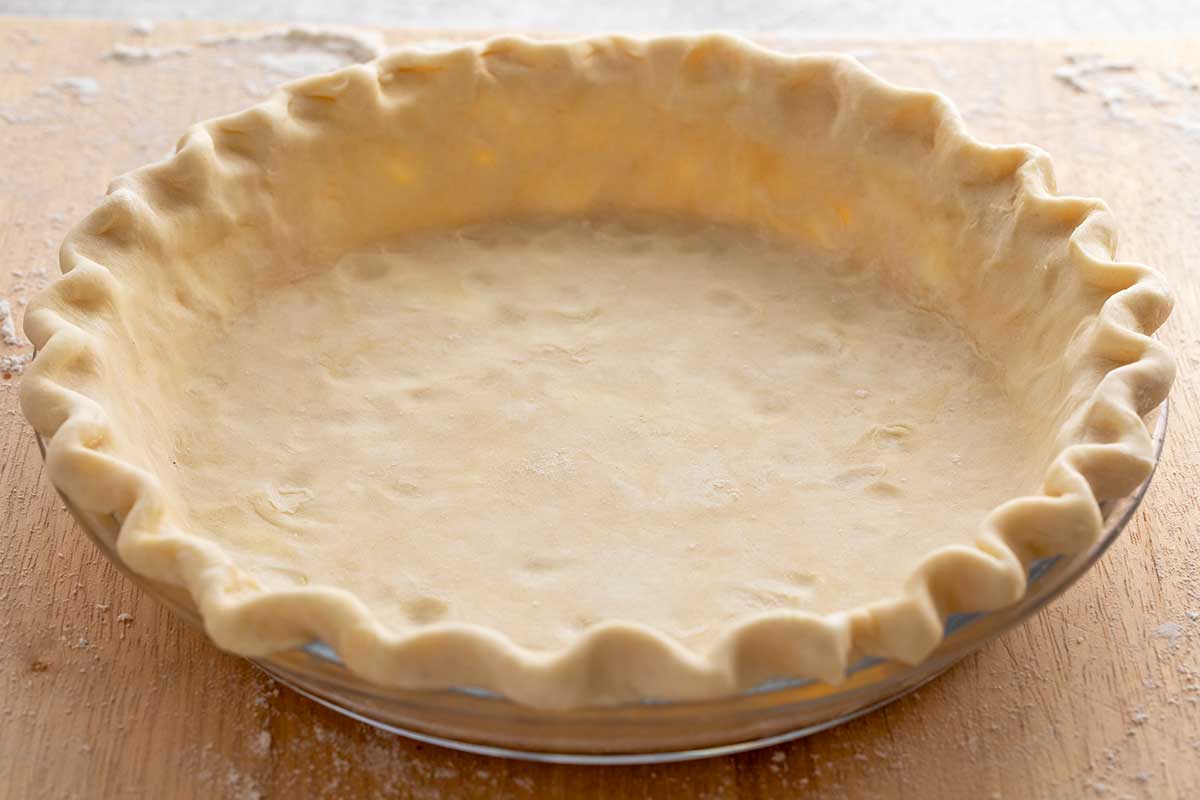
Step 5: Form the Crust
Make the quiche in a 9-inch pie plate. I prefer glass so I can monitor the color change on the sides. Once the edges are trimmed, tucked, and fluted, freeze the quiche for 20 minutes to firm up the butter.
Make Ahead Tip: You can cover and refrigerate the crust for up to 2 days to prep ahead. That way, you can blind-bake, fill, and finish baking within an hour.
Step 6: Preheat the Oven
For even cooking, set the oven rack to the middle position. Preheat the oven to 375 degrees.
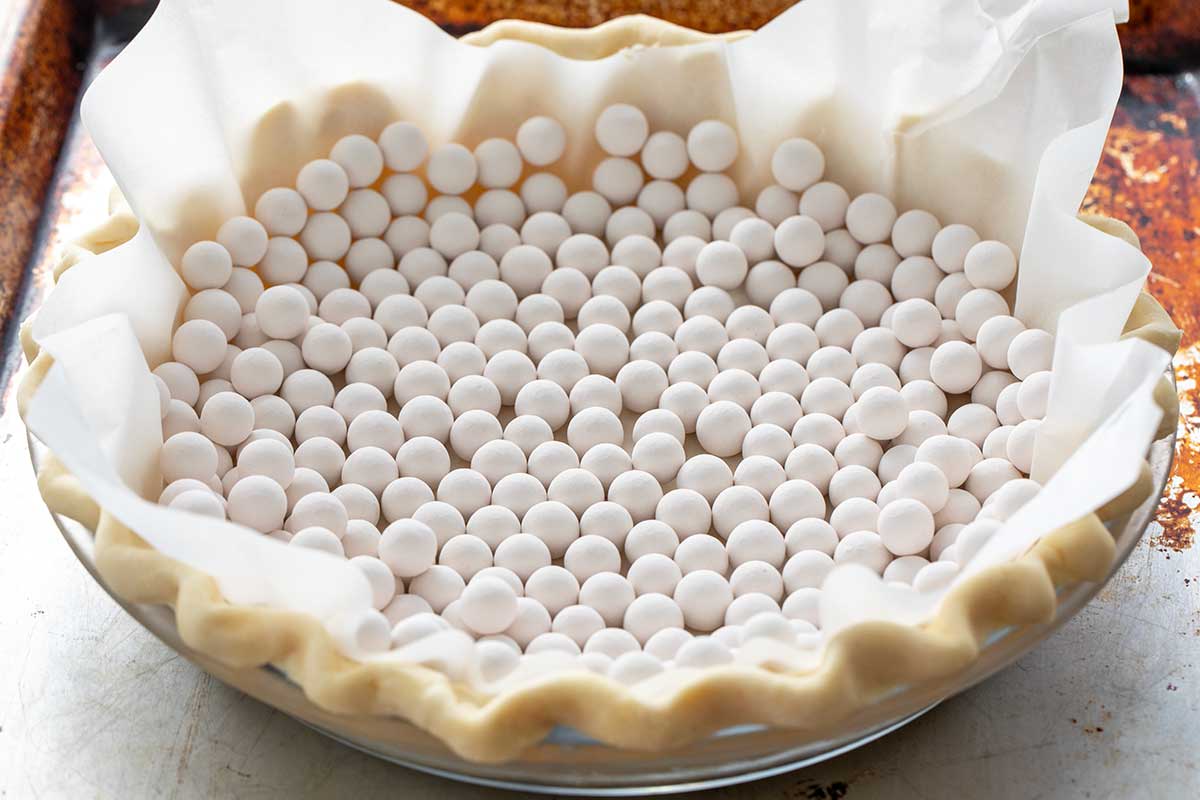
Step 7: Par-Bake Pie Crust
To prevent the bottom of the crust from becoming soggy from the wet custard filling, you will need to par-bake it, which is also known as blind-baking. Place a small piece of parchment paper in the shell, then cover the bottom and sides with pie weights or beans. I use 2 cups (20 ounces) of ceramic pie weights.
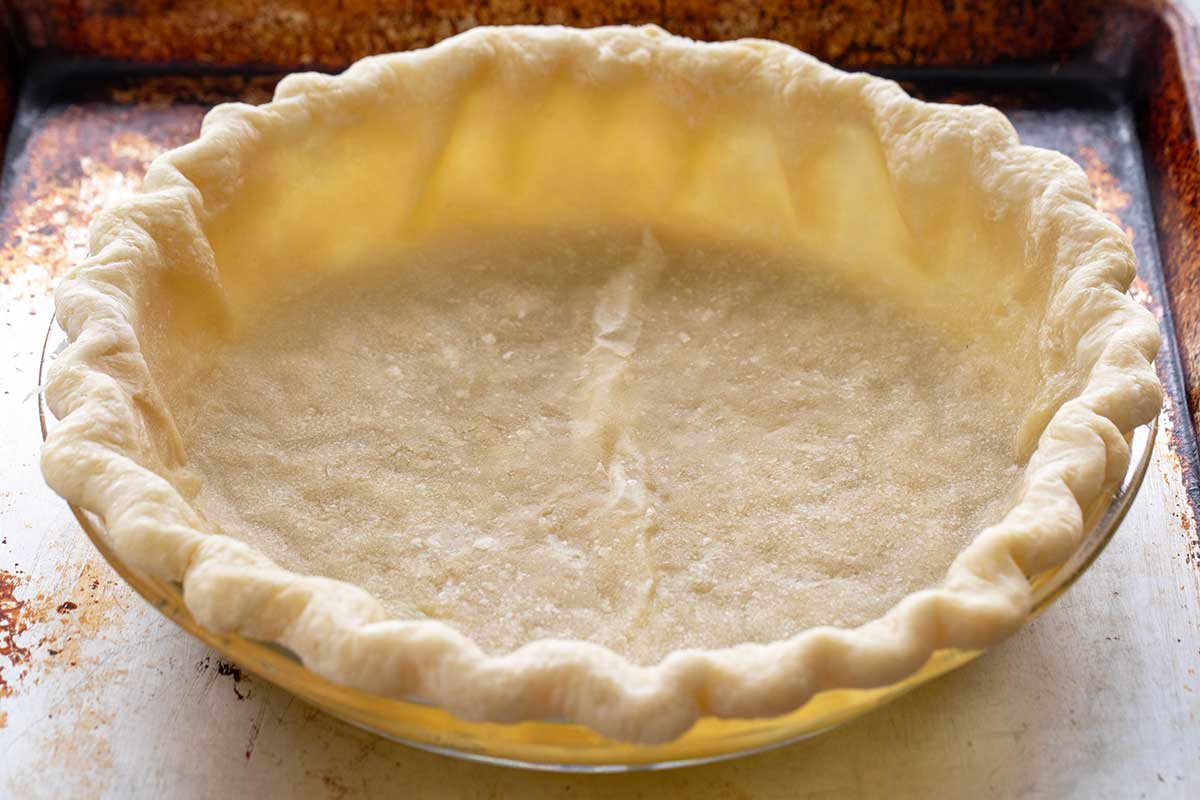
After 20 minutes, the flour proteins begin to set and very lightly brown, preventing the crust from shrinking. After removing the weights, bake for 5 additional minutes to heat the area of the shell that was previously covered.
Step 8: Layer the Quiche Filling
Layer the ingredients inside the crust. Evenly sprinkle half the cheese and half the green onions so that they don’t just float to the top. The onions add a fresh, earthy taste without being as pungent as raw white or yellow onions. The dense cubes of ham go in the middle, followed by more green onions and cheese to lock everything together.
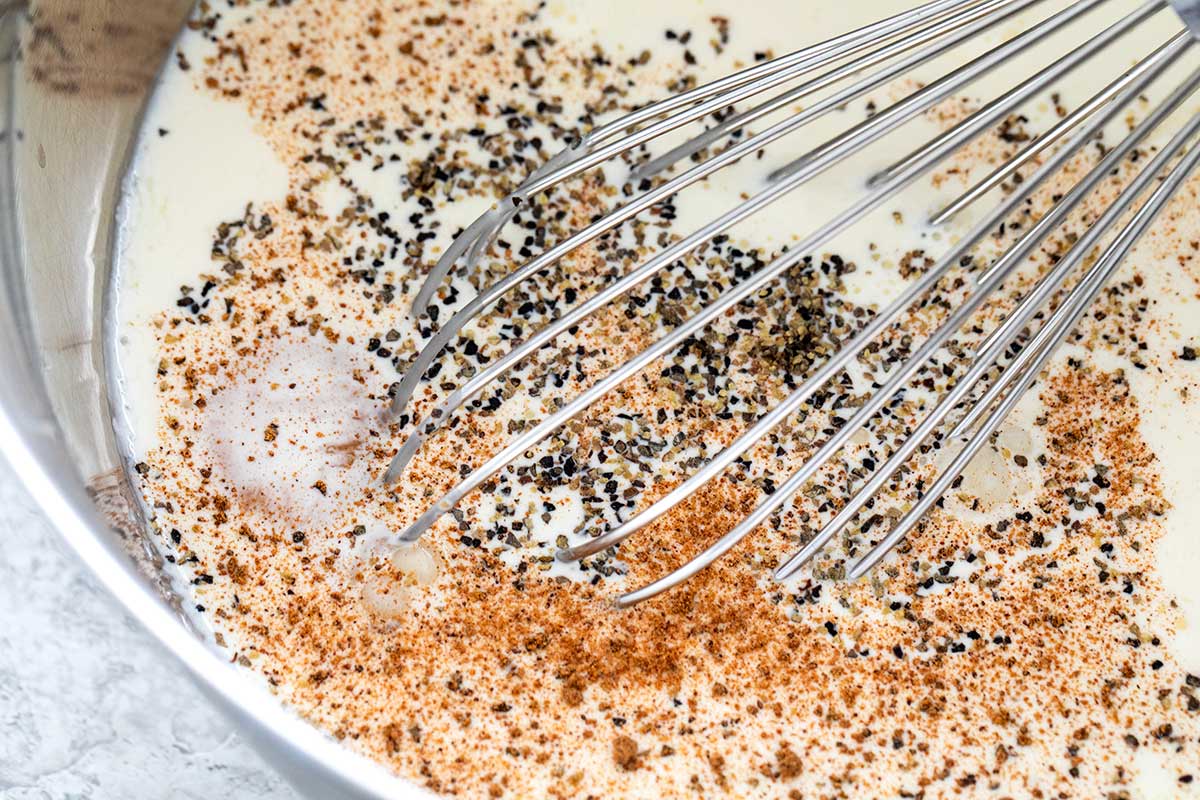
Step 9: Mix the Custard
Ingredient selection is key to achieving a smooth base that firms up just enough to slice. To create richness without leaving a greasy film in the mouth, I use high-milkfat products, heavy cream (36%), and whole milk (3.5%). Half-and-half is a good substitute but has a slightly lower milkfat percentage, about 19-20%.


For every cup of dairy, you need 2 eggs. The albumin proteins help solidify the liquid egg mixture. However, for a creamier consistency, I use 3 whole eggs and 1 egg yolk. The quiche is seasoned with salt, pepper, and a hint of nutmeg. Pour the mixture into the shell.

Step 10: Bake
Bake the quiche on a baking sheet until the edges of the custard have set, and the center is slightly jiggly but not fluid—about 45 minutes. I find the edges measure about 200 degrees, and the center about 185-190 degrees.
Tips for Perfect Execution: These temperatures allow carryover cooking during the cooling period, so the egg texture stays smooth and creamy. Overcooking causes the proteins to pack closely together, pushing out moisture and yielding a rubbery texture.

Step 10: Cool and Serve
It’s best to cool the quiche until it reaches just above room temperature so that the crust hardens and the custard has time to set. Ample cooling makes for cleaner slices, and the pieces reheat well.
Frequently Asked Questions
Yes, but keep in mind that substituting milk for cream will change the quiche’s consistency. Your best bet is to use whole milk instead of cream or a combination of heavy cream or whole-fat milk with reduced-fat milk.
Baking the quiche at 375 degrees ensures gentle cooking of the egg proteins over a longer period. The whole egg proteins start to set around 144ºF (62.2ºC). However, the fat in dairy products prevents the custard from binding too tightly. This also requires a higher temperature, above 185 degrees in the center, for the custard to set into a gel-like structure. This is when I stop baking to allow for gentle carryover cooking.
For the perfect consistency, a quiche should be cooked for about 45 minutes. The quiche should be cooked uncovered for at least the first 25 minutes. After that, if you feel the edges are getting too brown, cover with aluminum foil and continue baking, checking every 10 minutes. You can also cover just the outside crust with foil and continue baking.
If your finished quiche is watery instead of perfectly set, there are a few reasons why. The custard filling could be overbaked or underbaked, so make sure to check the internal temperature of the finished quiche. The egg-to-dairy ratio could be off, or the quiche filling could contain ingredients that add too much liquid (like some vegetables).
More Quiche Recipes


If you tried this Ham and Cheese Quiche Recipe, please leave a 🌟 star rating and let me know how it went in the 📝 comments below!
Ham and Cheese Quiche

Ingredients
Pie Crust
- 1 ½ cups all-purpose flour
- ½ teaspoon kosher salt
- 14 tablespoons unsalted butter, cut into ½" cubes, chilled
- ½ ice-cold water chilled
Quiche Filling
- 1 cup grated cheddar cheese
- ¼ cup sliced green onions, or chives
- 1 ½ cup diced ham steak, ¼" dice
- 3 large eggs
- 1 large egg yolk
- 1 cup whole milk
- 1 cup heavy cream
- ½ teaspoon kosher salt
- ¼ teaspoon ground black pepper
- ⅛ teaspoon ground nutmeg
Instructions
- Break Down the Butter – Using a stand mixer with the paddle attachment, add the flour and salt. Mix at the lowest speed (Stir) for about 10 seconds. Add the chilled diced butter to the bowl. At the lowest speed, turn the mixer on and off quickly for a few seconds to coat the butter with the flour. This helps to prevent the flour from spilling over.Continue to mix on low speed (Setting 2) until the mixture resembles wet sand with coarse crumbles and some pea-sized pieces remaining, about 75-seconds. Use your fingers to break up any large pieces. Do not overmix. The dough should not bind together before adding the water. Alternatively, use a dough/pastry blender or your fingers to break the butter into the dough.
- Hydrate the Dough – Gradually add 1 tablespoon of ice-cold water to the bowl. After each addition, turn the mixer on for 1 to 2 seconds. Add only enough water until the dough looks lumpy and hydrated but not wet or sticky. Not all the water may be needed; about 5 to 6 tablespoons is typical. When the dough is pinched, it should compress and hold, not be dry or crumbly. Do not over-mix.
- Rest the Dough – Press the dough into a 1” thick round disc, wrap it in plastic wrap, and place it in a resealable bag. Store in the refrigerator to rest for at least 4 hours, overnight, or up to 2 days.
- Roll the Dough – Remove the dough from the refrigerator and allow it to sit at room temperature for 5 to 10 minutes. If it’s still too hard, let it sit at room temperature until it's more pliable. Dust the counter and dough with flour. Rotate and dust as needed to prevent sticking. Use a rolling pin to flatten the dough into a 14-inch circle, slightly thicker than ⅛-inch thick.
- Form the Crust – Place the dough into a 9-inch pie dish and gently press against the sides and bottom. With a paring knife, trim the excess dough, leaving a ½-inch overhang. Tuck the extra dough underneath the bottom crust edges. Crimp by pinching the dough using the pointer and thumb fingers. Place the pie dish in the freezer for 20 minutes.
- Preheat the Oven – Set the oven rack in the middle position. Preheat to 375°F (190°C).
- Par-Bake Pie Crust – Place the chilled pie dish on a sheet pan. Place parchment paper on top of the crust, then add the pie weights to cover just the bottom and sides; do not overfill. Bake until the edges are lightly golden and just begin to set, about 20 minutes.Remove the crust from the oven and allow the weights to sit inside for about 4 to 5 minutes to press down any puffed areas. Remove the paper and weights; they will not be used again. Bake for another 5 minutes to dry the bottom of the crust before filling. The crust may be a bit puffy, but it will deflate as it sits. Set on a wire rack while making the filling.
- Layer the Quiche Filling – Evenly sprinkle half of the cheddar cheese and green onions into the par-baked pie crust. Top with all the ham, followed by the remaining green onion and cheese.
- Mix the Custard – In a medium bowl, whisk together the eggs, egg yolk, whole milk, heavy cream, salt, pepper, and nutmeg. Slowly pour the egg mixture into the pie crust, allowing it to settle around the ingredients.
- Bake – Bake the quiche on a sheet pan until the surface and crust are golden brown, about 45-50 minutes. On an instant-read thermometer, the center should be 185 to 190ºF (85 to 88ºC). A knife is inserted about 1 inch from the edge should come out clean and not wet.
- Cool and Serve – Cool the quiche on a wire rack until it reaches room temperature, about 1 ½ to 2 hours. Slice and serve.
Recipe Video

Notes
- Using store-bought crust: For an unbaked refrigerated ocrust, follow the same instructions for shaping and par-baking in the recipe. If using a frozen crust, allow it to defrost before using.
- Storing: Cool completely, cover, and refrigerate for up to 7 days.
- Freezing: A whole quiche or slices can be wrapped and stored in a plastic bag for up to 1 month.
- Reheating: Reheat refrigerated individual slices in the microwave at high power in 15-second intervals until warmed through. Alternatively, bake slices in the oven at 375ºF (191ºC) on a foil or parchment paper-lined sheet pan, about 10 to 15 minutes. If frozen, bake sliced for 20 to 25 minutes. Defrost a whole quiche, then bake until warmed through.
Nutrition Facts
Percent Daily Values are based on a 2000-calorie diet. All nutritional information is based on estimated third-party calculations. Each recipe and nutritional value will vary depending on the brands you use, measuring methods, and portion sizes per household.


Christi M says
I made this with leftover ham from Easter, and used my regular recipe for the crust. I used whole milk and half-and-half, and skipped the nutmeg. It was delicious and the texture was very good. I would have preferred it with less ham, but my husband LOVED it. Next time I’ll try it with bacon.
Jessica Gavin says
What a great way to use your leftover ham! I love the idea of using bacon next time in the quiche. Thanks for making the recipe, Christi!
Liz says
Came out beautifully! I added cooked, shredded hashed browns to the filling and otherwise followed ingredients and instructions as given.
Wonderfully soft eggs, fantastic flavor, will absolutely bake this quiche again!
Jessica Gavin says
I love that you added hash browns to the quiche! I’m going to have to try it!
Lisa says
Is the amount of butter correct? Isn’t it typical to use 1 stick of butter for one pie crust?
Mike says
I will be making this soon as it looks really delicious! Question: Can I add some spinach to this recipe? If so, should I use frozen or spinach? Or would using spinach make it too moist when it cooks and fall apart?
Jessica Gavin says
Hi Mike- You could add some spinach, frozen that has been defrosted and well-drained, or fresh that has been cooked down (saute or blanching). Let me know how it goes!
Dave says
I make something very similar but, due to personal preference and being lazy, I use par-cooked potato slices or hash browns for the crust. ? Very customizable.? And, your science notes are always very much appreciated. ♥️
Jessica Gavin says
Wow, using potatoes for the crust sounds delicious, I’ll have to give it a try!