
The grilling cooking method satisfies so many primal urges; what’s not to love about a T-bone, lightly charred on the outside and tender, pink, and juicy in the center? For the flavor grilling gives meat, fish, and vegetables, it’s no wonder it’s America’s favorite pastime.

Jump To a Section
These days, everyone, everywhere, has a grilling technique, specialty grill, or cookbook that they swear by, but no matter what the end goal, it’s almost always the same: juicy, smoky, flavorful meat and vegetables cooked over an open flame.
Firing up a grill takes us back to the basics, lets us enjoy the outdoors, and reconnects us with our inner cavemen. You don’t need every gadget or high-end device, though. Just a simple grill, a cut of beef, and a few tricks up your sleeve will make for the best backyard BBQ this summer.
What culinary problem is this method solving?
Without the searing high heat of the grill, we’d be forced to cook with less heat and sacrifice flavor. Grilling meats and vegetables gives a delicious boost to aroma and flavor because of caramelization, when proteins and sugars undergo a transformation due to the Maillard reaction, a chemical reaction that is responsible for food browning as it cooks. Think marshmallows, caramelized onions, and yes, that steak, too.
What is Grilling?

Grilling is a method of dry heat cooking using direct, radiant heat. It can cook meat and vegetables very quickly, which is great for any night of the week.
Cooking on a grill takes advantage of a process called thermal radiation. The heat source could come from above or below the food, but we usually call food ‘broiled’ when the source is above the food. Most grills heat from below.
Benefits of Grilling
- Time: Because of the high heat, grilling can be a quick way to cook. You can grill fish or shrimp skewers in a few minutes or a whole chicken in under an hour.
- Taste: Nothing can beat the flavor of charred meat cooked over an open flame.
- Texture: Grilling sears the exterior of the meat, which many believe to seal in the juices for superior, mouthwatering texture.
- Nutrition: One of the nice things about grilling is that you don’t have to use a lot of oil. However, marinating meats and vegetables before grilling may reduce any carcinogenic compounds that are associated with grilling at higher temperatures.
Different Ways to Grill

When you’re thinking about grilling, there are two main options: a gas or charcoal grill. I’ll discuss both the pros and cons of each method.
Gas grilling: This style of grilling is very convenient, but cooking with propane doesn’t yield the super high temperatures that a charcoal grill can. Propane, a flammable hydrocarbon gas, is present in natural gas and used as bottled fuel sold by the tank. Gas grills can often be used on patios and balconies, but sometimes are larger and are more difficult to move. Just in case, you might want to have an extra tank of propane as a backup because no one wants to run out of cooking gas halfway through the burgers!
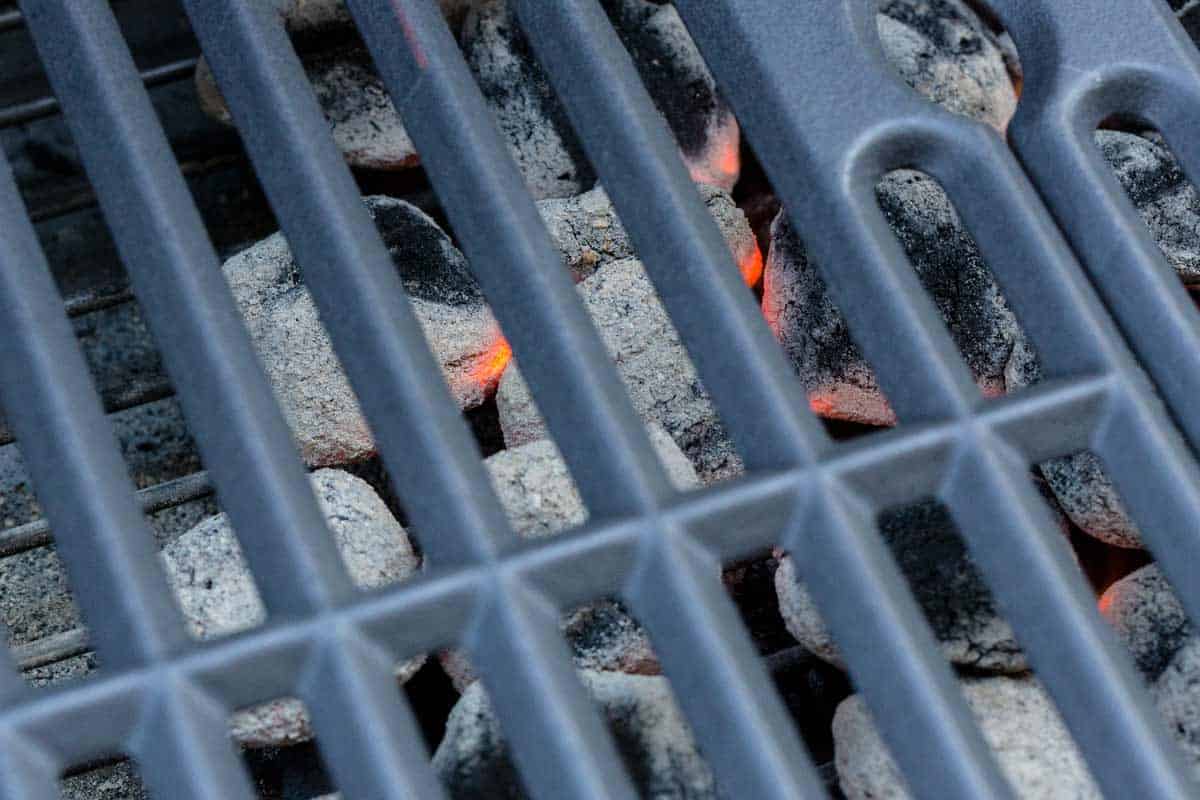
Charcoal grilling: Using a traditional charcoal grill can be really fun. First of all, it’s versatile and allows for several different coal arrangements, depending on what you’re cooking. A charcoal grill has the potential to get very hot and gives great grilling results. You need to learn how to light a charcoal grill, however, and you also need to store the extra charcoal in a dry place, away from the elements. When it comes to choosing charcoal, should you choose lump charcoal or briquettes to use with your grill?
Charcoal Grilling: Briquettes vs lump

Lump charcoal tends to burn hotter than briquettes, but lump may need a little managing to keep the heat consistent. Unlike pure lump charcoal, briquettes are manufactured wood by-products compressed with additives and chemicals that help them light quickly and burn consistently.
They provide a more stable burn, maintaining a steady temperature for a longer period of time with less hand-holding than lump charcoal. Briquettes are ready to light with a match, while lump charcoal requires a chimney starter or charcoal lighter fluid. Both ways to light lump charcoal are explained below.
How to light a charcoal grill

Using a chimney starter to light charcoal:
Perhaps the best way of all to light a charcoal grill is to use a chimney starter, a commonly found metal cylinder with a handle that makes lighting coals a snap.
- Fill the chimney with the appropriate amount of charcoal and place it on the grill’s bottom grate. A standard chimney holds about 100 briquets, but depending on your grill’s size, you may not need that many.
- Follow the chimney instructions to add one or two sheets of newspaper to the bottom of the starter. Light the newspaper in several spots. As the newspaper burns in the chamber below, the flames light the edges of the charcoal above. Peek through the chimney vents to check if the coals have started and turned gray.
- After 8-10 minutes, you might see the coals starting to glow through the vents and flames starting to flicker over the top layer of coals. Pour them out into a pile and wait until they are mostly covered in ash and gray in color. Then, spread the coals out. The entire process takes approximately 15 minutes.
How to use lighter fluid to light charcoal:
If you have a chimney starter, you can forgo lighter fluid entirely; you’ll be grilling with a cleaner taste and fewer chemicals. However, if you have no choice but to use lighter fluid, please use it carefully, following the instructions on the label.
- Pile the charcoal on the center of the bottom grate of the grill.
- Squirt the lighter fluid onto the coals and light it immediately. Never squirt fluid onto lit or burning coals.
- Coals are ready to use when covered with gray ash.
Grilling with Wood
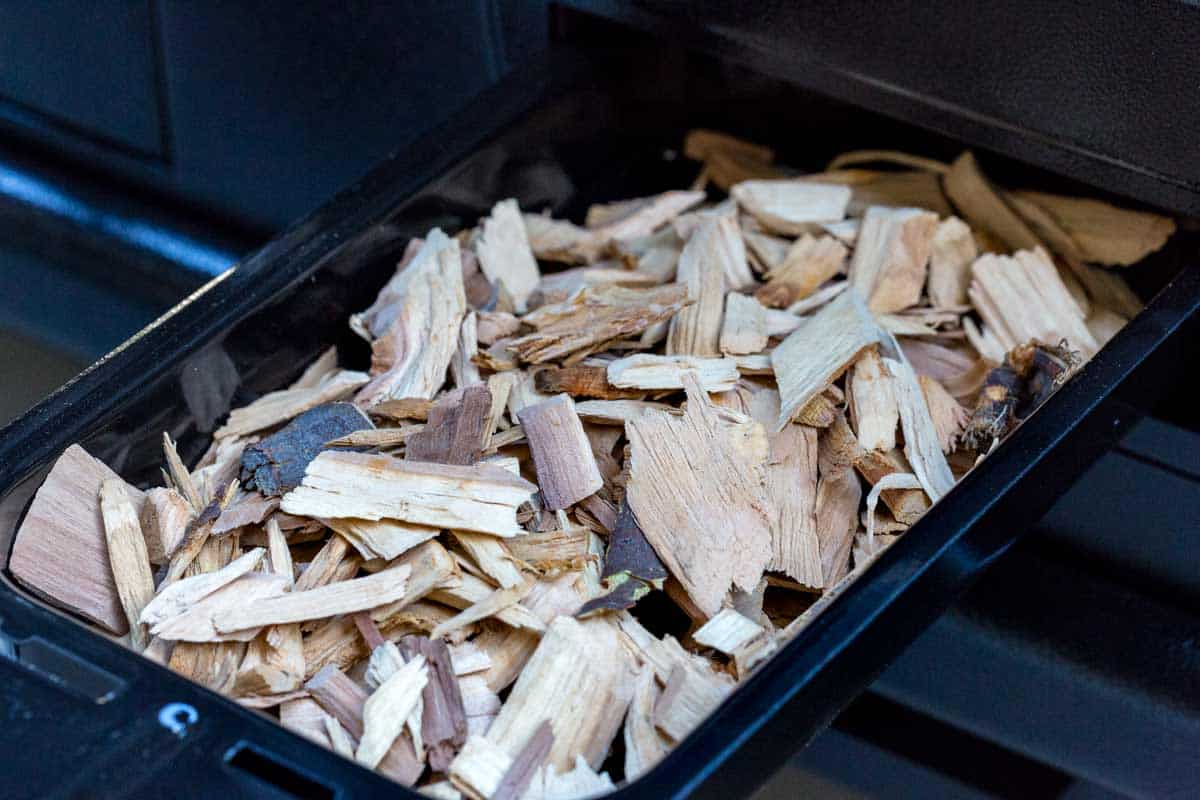
If you’re ready to take your grilling game a couple of steps further, you might consider grilling over an open fire or using wood chips. It’s definitely not for the beginner griller, and you need a safe location for a fire pit or a grill that can accommodate an open wood fire inside it, which can get expensive.
The taste is pure outdoors, just you and the meat, and maybe a little extra smoke!
- Always use seasoned (dried) hardwoods like oak, alder, ash, beech, hickory, maple, or pecan. Softwoods like pine and fir produce a resinous smoke that generally spoils the flavor of food.
- If you’ve ever built a campfire or started a fire in a fireplace, you may be familiar with the process: Create a teepee of small twigs atop a pile of kindling (wood chips, newspaper, or other tinder), adding larger pieces of wood as the fire catches. You can also start a wood fire in a chimney starter. Fill the chimney with hardwood chunks and light as you would charcoal. Or light some charcoal in a chimney starter, and use it as an under-fire to bring the wood to flame.
- Allow up to 45 minutes for the fire to mature and burn down to embers. Then, with a shovel or long-handled grill hoe rake the glowing orange embers underneath the grill grate. As with charcoal, the deeper the pile, the higher the heat. A common misconception among wood fire beginners is that cooking should be done over leaping flames.
- Wood burns faster than either lump charcoal or charcoal briquettes. Be prepared to replenish the embers every 20 to 30 minutes.
- Open fires, i.e., those built on the ground or in a pit, are not allowed in many areas. Check with local authorities prior to your grilling session. An indoor wood-burning fireplace is also an option if you want to experiment with grilling over wood.
To cedar plank or not to cedar plank?

Using a plank, one of the thin boards sold by the pack in the grilling section of stores involves cooking your food directly on a piece of wood. The goal of using a cedar plank is to transfer some of the wood’s flavor to the food. Not only do you have to choose what type of wood might taste best with what you’re grilling, but you also have to make sure it doesn’t burn up while you’re cooking with it.
For delicate foods like fish, choose cedar or ash. I’ve done cedar plank salmon before. Maple, apple, or pecan make good choices for bolder meats, like chicken or pork, while oak, hickory, or mesquite can stand up to the stronger flavors of beef, lamb, or game.
Pro Tip: Before you use a plank, soak it in cold water for at least an hour in order to allow the water to absorb into the wood. The most common cooking method is to work only on the indirect side of a two-zone indirect fire. This will give you slow, even, gentle heat the whole time, allowing you plenty of time on the grill, which leads to more time for flavors to mingle and marry. You might even be able to reuse your planks a few times using this method.
The second method is to char the plank over the hot side of the grill first, then transfer it to the cooler side and place your food on it. This technique will make your meat even smokier.
Maintaining Your Grill

The most efficient way to clean your grill is at the beginning of your grilling session while the grill heats up. It’s easy to let the fire do most of the work for you. Preheating your grill for ten minutes or so is plenty of time to allow the food from the last time to burn off.
You can also run the grates over with the side of a pair of long tongs, a grill brush, or a grill brick. Once the grates are clean, dip a paper towel in some neutral cooking oil and rub it over them with your tongs to prepare them for cooking pizzas, veggies, or meat.
After you’ve finished grilling, allow everything to cool and lightly go over the grates with a grill brush. Wipe the exterior down with a cloth, empty out the ashes, and close the grill before storing. You don’t want rain to get inside the grill and corrode the interior.
For Perfect Grill Marks

Perhaps the best part of grilling is the picture-perfect cross-hatching of a beautifully grilled chicken breast or chop. Here’s how to get perfect marks every time.
- Preheat your grill for 10-15 minutes to make sure it’s nice and hot.
- Apply a thin coat of oil to your meat before grilling.
- Place your meat on the grates and allow it to sear. The meat will release when ready, but you can check this with the tip of a spatula, just in case you’re not sure. If the meat sticks, it’s probably not ready. Put it back down and wait.
- Turn the meat at a 45-degree angle to get that X of the grill mark. Use the center of what you’re grilling as the central axis point. Wait to flip until the meat naturally releases from the grates, but it shouldn’t take as long as the first time.
- Only worry about getting your meat or vegetables seared perfectly on one side. Otherwise, you risk overcooking.
Indirect vs Direct Heat
Obviously, the goal of grilling is to produce a beautifully seared piece of meat, but there are some ways to finesse a grill to give you both direct and indirect heat zones, which is crucial for cooking larger pieces like roasts or chickens without burning them.
Gas grills can have variable zones to achieve a good direct/indirect balance, but every grill is different. With charcoal grills, however, building those zones is up to you:
Direct fire: This arrangement uses coals spread evenly at the bottom of the grill for super hot, one-zone grilling. It is good for large quantities of food, like steaks and burgers.
Two-zone direct fire: This arrangement keeps the hot coals on one side of the grill while the other half just has a few to keep food warm. Chicken cooks well this way, as well as things that need a good sear on the hot side and then some indirect heat to cook through.
Two-zone indirect fire: All the coals are loaded on one side, leaving the other side empty. This is a good arrangement for roasts and whole chickens.
Three-zone split fire: In this configuration, coals are stacked against the sides, leaving a strip of the grill empty down the middle. Use this for pork roasts and smaller roasts.
Monitoring Grill Temperature

When to cover the lid and when to keep it open?
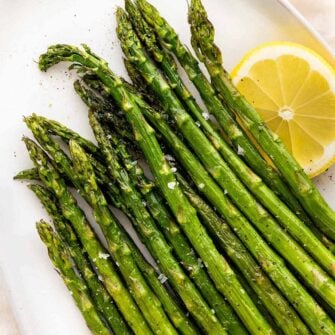
While it’s tempting to check and double-check the food, when exactly should you leave the grill open, and when do you close it? This one’s easy. If the food you’re cooking is 3/4” or thinner, like baby asparagus or slices of zucchini, keep the lid off.
If it’s a thick-cut pork chops, corn on the cob, or chicken breast, close the lid. Closing the lid takes advantage of the convection heat that grills are known for.
How to set the vents on your grill:

One last thing: most charcoal grills have vents on both the top and the bottom. When they’re opened, the hot air inside the grill will escape through the top vents, creating a negative pressure area inside the grill that draws cooler air in through the bottom vent.
The fresh oxygen that gets drawn in helps keep the fire hot. A grill with open vents actually burns hotter than a grill with the vents closed. If you’re looking to cool things down, consider closing the vents.


Jack Wilson says
Great article on all types of grilling–I’ve been doing this for 60 years, the first 50 exclusively on charcoal, but as age progresses, the convenience of propane is winning me over, but there is definitely a sacrifice of flavor–but only part of it, the BBQ flavor is still there, but the final result will depend more on the sauce or rub