
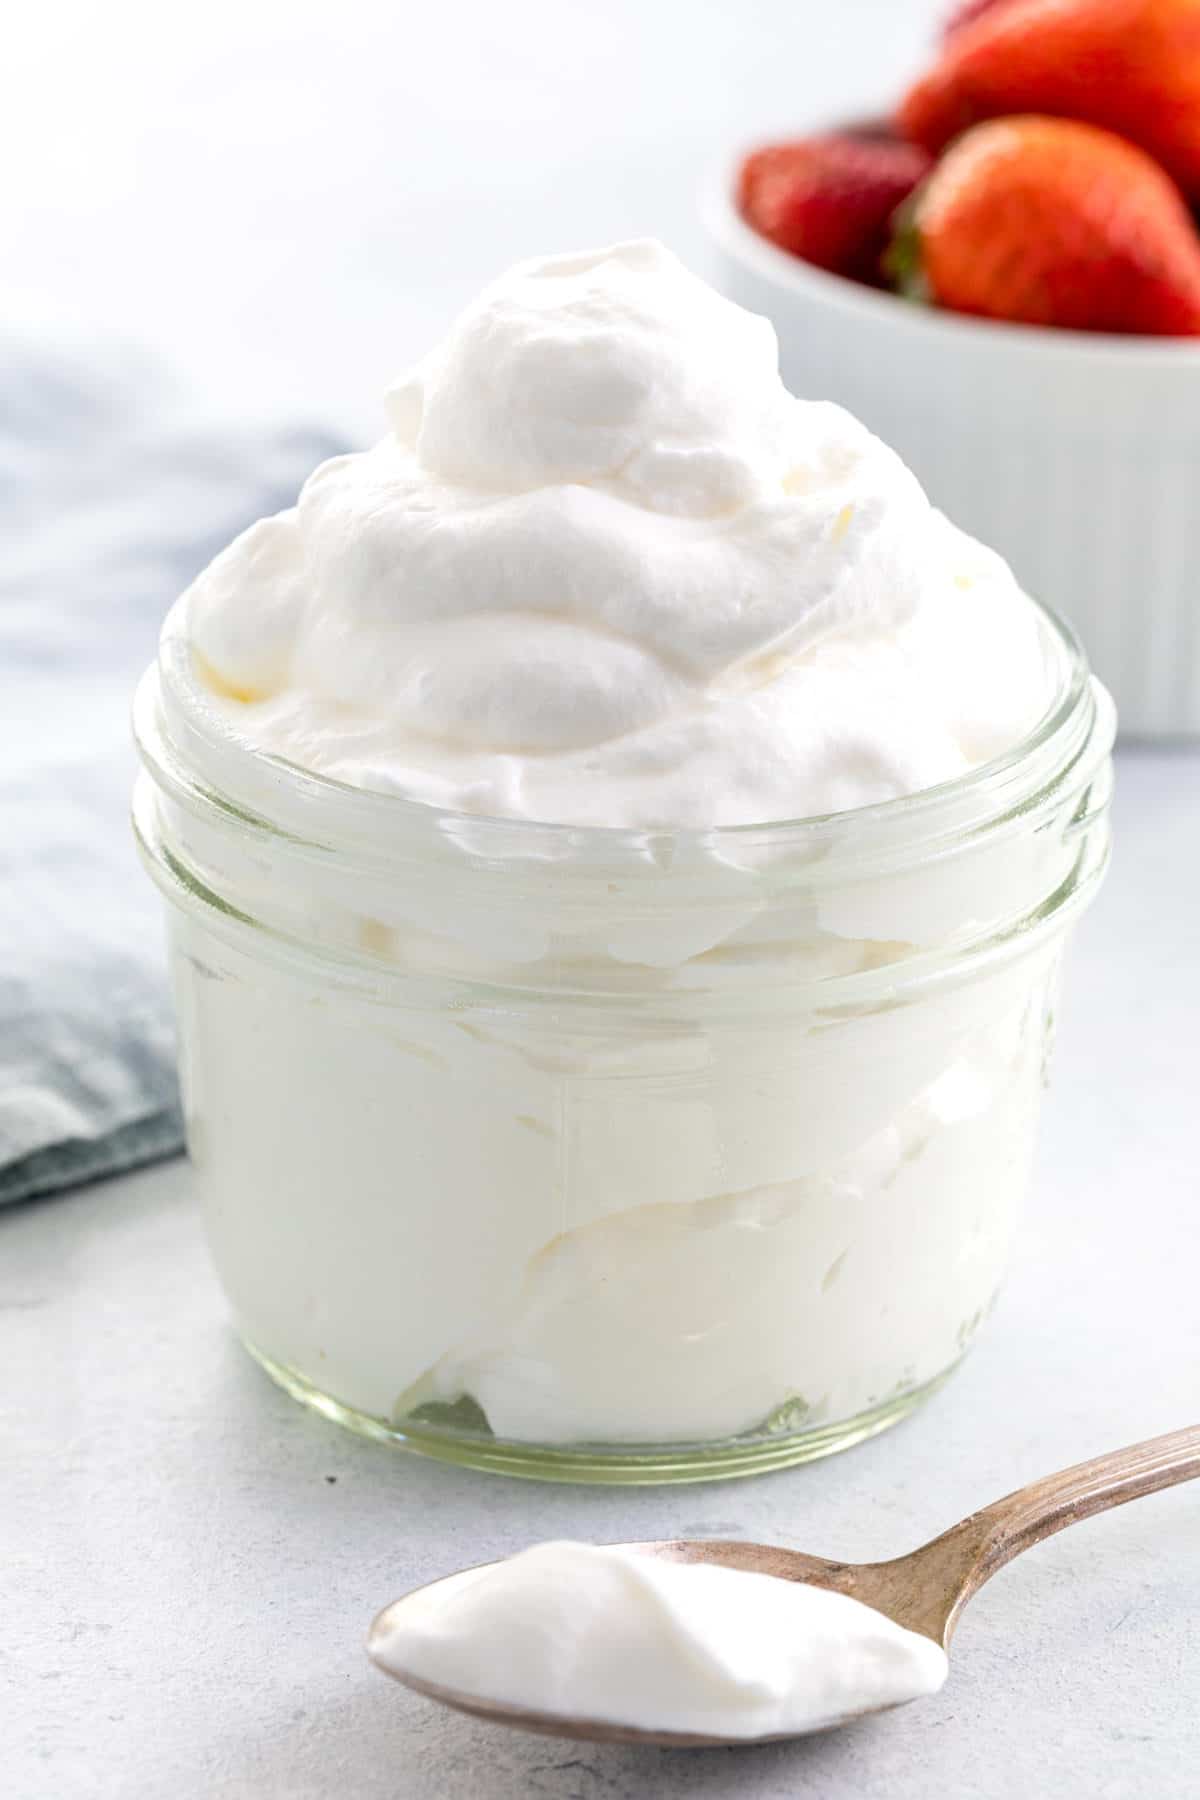
Learn how to make whipped cream using four simple methods: whisking by hand, a stand mixer, a blender, and a food processor. It only takes a few minutes to create a light and fluffy topping or filling!
Jessica’s Recipe Science
- Choose heavy cream (at least 36% milk fat) to stabilize air bubbles and create a thicker, longer-lasting whipped foam.
- Use powdered sugar because it dissolves instantly and contains a small amount of cornstarch that helps prevent weeping.
- Whip just to medium or stiff peaks to trap air in the fat network without overworking it, which can cause the cream to turn grainy.
Featured Comment 4
“It is so helpful seeing the photos of whip cream stages from under beaten to over beaten. I will be using this for a topping on cake when I make something for my sister. You think of all those ‘extra’ recipes to share with us.”—Judy
Why It Works
Making homemade whipped cream is easy! You really only need one ingredient: heavy cream. Whisking adds volume and that amazing light, smooth texture, but it’s important to know when to stop whipping, otherwise you’ll end up with a curdled consistency. Follow my steps, and you’ll be a pro in no time!
There are various tools you can use to make this whipped cream recipe. Go minimal with hand whipping or use a faster mechanical method. It’s up to you! It’s a quick topping to add to your favorite sweet treats like a cream pie, ice cream sundaes, waffles, cakes, hot chocolate, or serve with fresh fruit.
Jump To a Section
Ingredients You’ll Need

- Cream: I use cold heavy cream or heavy whipping cream (at least 36% milk fat) because the higher fat content creates a thicker, more stable whipped cream with a richer taste. When tested side by side to whipping cream, it holds its shape better and has a noticeably creamier texture.
- Sugar: I add powdered sugar (confectioners sugar) because it sweetens while helping stabilize the whipped cream. The fine texture dissolves instantly, and the small amount of cornstarch typically added prevents weeping, allowing the cream to hold its shape longer.
- Flavoring: Vanilla extract enhances and rounds out the whipped cream’s flavor. Even a small amount boosts sweetness perception and adds warm aromatic notes. Vanilla bean or paste adds a gourmet appearance with the specks of vanilla.
See the recipe card below for all ingredients and measurements (US and metric).
Ingredient Substitutions
- Cream Options: When you use whipping cream (30–35% milkfat), its lower fat content creates a lighter, softer foam than heavy cream (at least 36% milkfat). Because there’s less fat to stabilize the air bubbles, it won’t whip as thick, won’t hold its shape as long, and can deflate or weep more quickly, especially if you’re piping or making filled desserts.
- Sugar Swaps: Granulated sugar sweetens the whipped cream while strengthening the foam structure as it dissolves. It creates a clean sweetness, though it takes a bit longer to fully incorporate compared to powdered sugar.
- Stabilized Whipped Cream (Optional): You can use a small amount of melted gelatin to make stabilized whipped cream. I use ½ teaspoon gelatin per 1 cup of heavy cream. I tested 1 teaspoon of gelatin, but you lose that smooth melt-ability, and the gelatin leaves a film in your mouth.
How to Make Whipped Cream
Store-bought whipped cream can’t compete with the silky, cloud-like texture you get when you make it fresh at home in just minutes. There are four methods for making homemade whipped cream from scratch:
- Hand-whipping is great for smaller batches; it takes a little longer but gives the most control.
- Stand mixer (or hand mixer) is great for large batches and works quickly.
- Blender yields a stable product due to its small, sharp blade and its quick rotation, which add air to the cream; however, it needs to be carefully monitored.
- Food processor swiftly makes a large batch. A little less stable over time compared to a mixer and a blender, but good if using right away.

Option 1: Hand Whipping
I recommend chilling the large metal mixing bowl and whisk for at least 15 minutes before beating the cream by hand. This will accelerate the process because cold utensils keep the fat in the cream chilled, resulting in a light, airy product that holds its shape better.
The process takes about 4 to 5 minutes, causes a little more fatigue, but gives the most control over the peaks. You can really see the cream transform and gain volume. Take breaks as you need to!

Option 2: Stand Mixer (or Hand Mixer)
Use the whisk attachment on your stand mixer or handheld mixer. These incorporate air into the cream very quickly. If you’d like, you can chill the bowl and beaters or whisk, but I find it doesn’t significantly reduce the time compared to hand-whipping. Use different speeds during the process to be sure it doesn’t get over-whipped.
I like to start at a medium-low speed to fully incorporate the confectioners’ sugar and vanilla, just until the mixture is foamy. Ramp up the speed to medium-high until soft peaks form. Lower the speed slightly to create medium or stiff peaks. This is the critical point at which it can curdle in seconds if not carefully watched and gradually whipped.

Option 3: Blender
The sharp, quick blades of a countertop blender can whip cream in under 30 seconds! My Vitamix has a variable speed setting from high to low. Start at the lowest speed to incorporate the ingredients and begin thickening the cream. Turn to the highest setting to quickly add air. It only takes 10 to 20 seconds, depending on the desired consistency. Blend in short 5-second intervals as it thickens quickly!

Option 4: Food Processor
The wide bowl and big blade of the food processor can aerate the cream in less than 1 minute. I use my 8-cup food processor to make the whipped cream, which has plenty of volume for doubling in size. It takes about 30 seconds using the “high” setting to thicken the cream, then just a few additional seconds for firmer peaks. I found in my testing that this method is best if using the cream the same day. It doesn’t hold its structure well the next day.
Whipped Cream Doneness
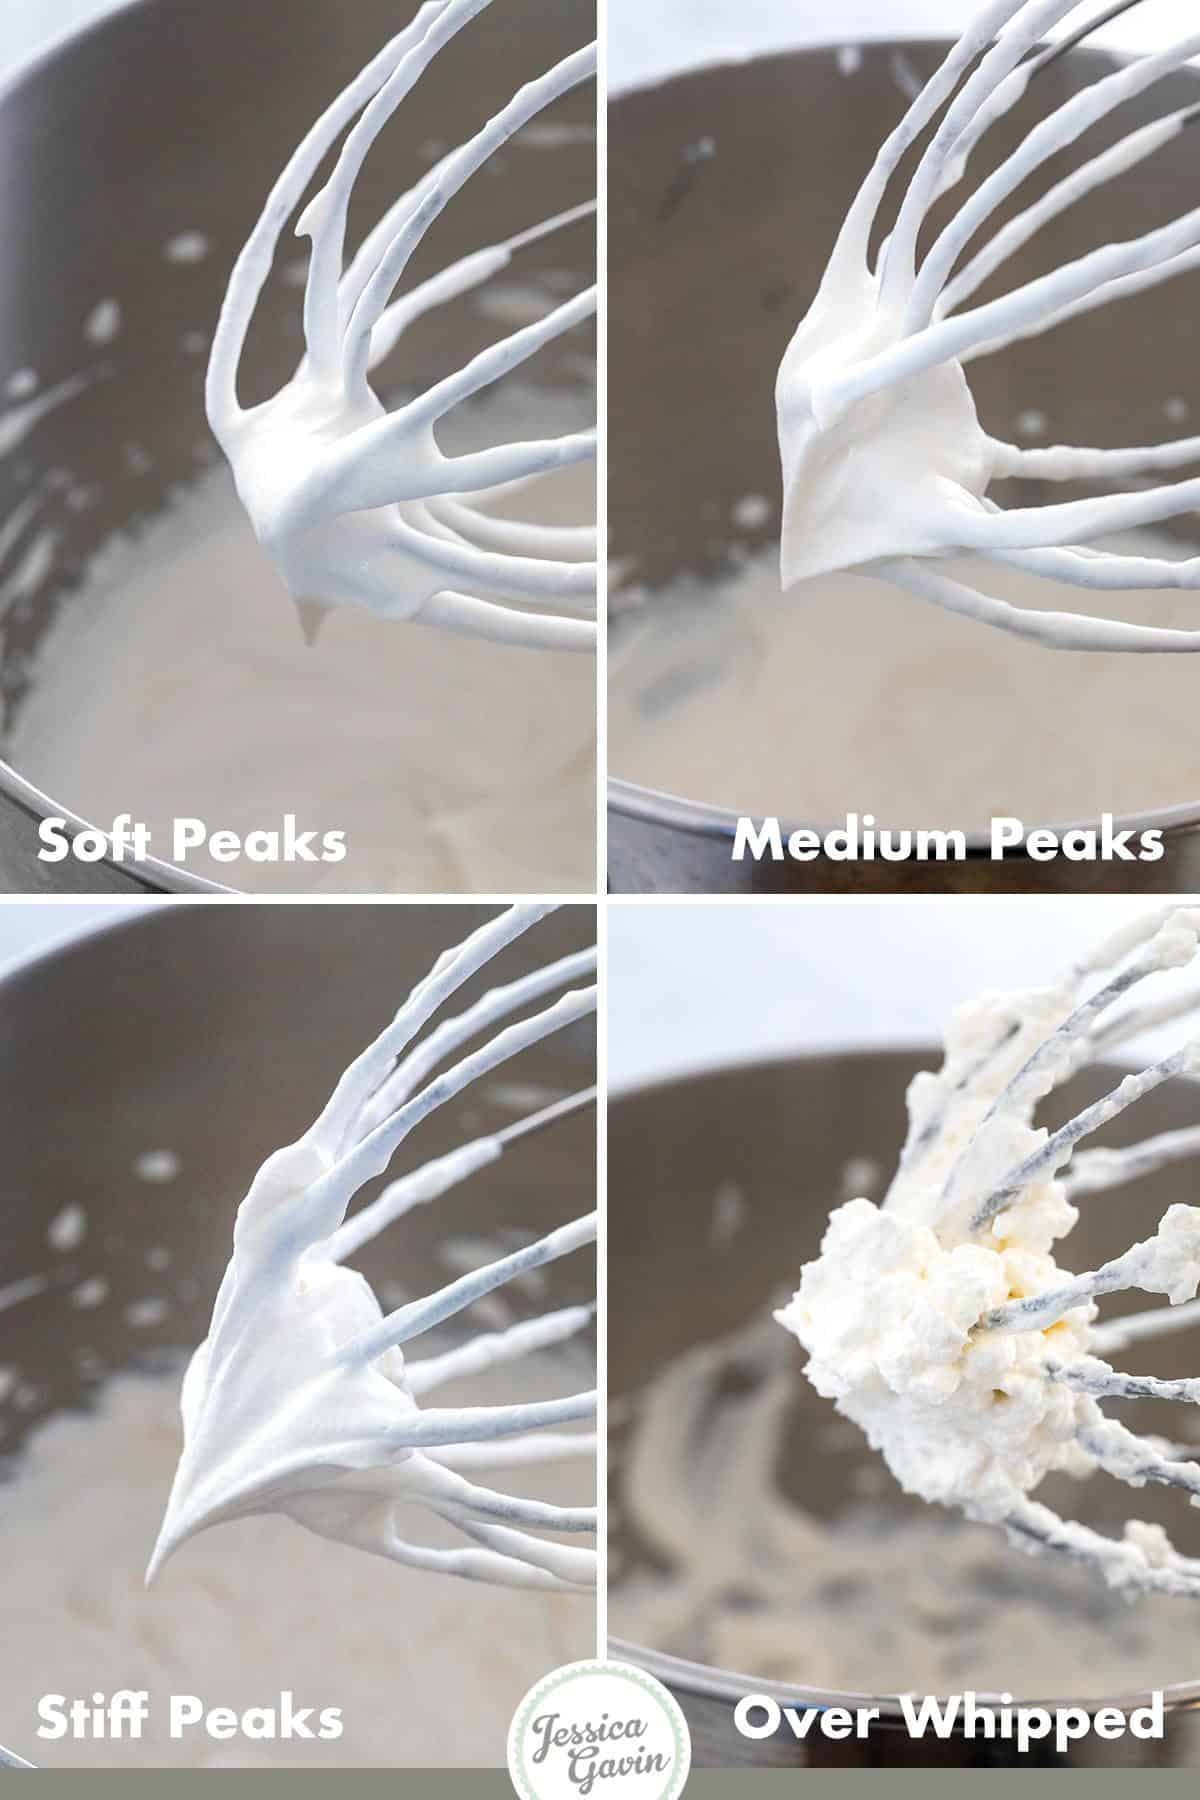
- Soft plop: Looks like slightly melted ice cream. Lift the whisk out of the bowl, and the cream barely clings to it. Just starting to see trails of cream when whipping, but it doesn’t dissolve right away. Not ready!
- Soft peaks: Looks like stirred yogurt, and it doesn’t hold a prominent shape. Cream clings to the whisk, but the peak falls over. In the bowl, the cream trails float on top. Use for a delicate, super-silky, scoopable topping to eat right away.
- Medium peaks: Looks like Cool Whip or soft-serve ice cream. Lift the whisk, and the cream firmly clings on. Turn over, and the peak will hold, but has a slight tip that falls over. In the bowl, the trails will be noticeably stiffer, and the cream will be fluffier. Used for most applications, such as cake layers, frosting, pie toppings, and fillings in cream puffs or profiteroles.
- Stiff peaks: Looks like shaving foam. Lift the whisk and the cream is completely stiff, turn over, and it holds its peak. The cream will have a definitive ripple when whipped. It will start to look and feel slightly grainy, and if you mix it once more, it will clump. Used as a stronger filling for cakes and layered desserts like trifles, as a topping for pies, and as a folding ingredient in no-bake cheesecakes.
- Over-whipped cream: Looks like shaving foam, but with noticeable lumps. The smoothness is lost, and the more you mix, the more bumpy it gets.

Frequently Asked Questions
Heavy cream (or heavy whipping cream) contains at least 36% milkfat. Whipping cream (or light whipping cream) is at least 30% milkfat, but less than 36% milkfat. I tested both, and there is a noticeable difference in taste and texture. Heavy cream is much richer due to its additional fat; it also aerates faster and holds its shape longer. Whipping cream works well as a lighter topping for ice cream and shakes. If you want a creamier, sturdier filling, use heavy whipping cream.
Incorporating air into the cream approximately doubles the volume. Therefore, if you need 2 cups of whipped cream, start with 1 cup of heavy cream. To dollop on a dessert, plan for 2 tablespoons per serving. For cupcakes, use about ¼ to ⅓ cup of whipped cream. Follow recipe suggestions for larger pies, cakes, and your favorite desserts.
You can substitute granulated sugar for powdered sugar. During testing, I noticed that the granules made the cream whip more quickly. They act like tiny rocks in the cream, creating air pockets that dissolve over time. Since the crystals are larger, you may taste little crunchy pockets of sugar.
Powdered sugar delivers a more even sweetness because it’s finely ground. It’s perceived as slightly less sweet because there aren’t granules that have to dissolve in the mouth. Honey or maple syrup can also be used, although I recommend using half the amount of liquid sweetener. They contain water and require a longer whipping time, but the end result isn’t very stable.
When air is vigorously whipped into chilled cream, the cold fat helps trap the air bubbles, creating a thick, stable foam. If you add too much agitation, the fat joins together into larger clumps, giving a grainy consistency. You cannot smooth out the whipped cream at this point. If you keep mixing, eventually you’ll create churned butter as the liquid buttermilk separates from the fat.
Yes, you can freeze whipped cream! Pipe or dollop the freshly whipped cream onto a parchment-lined baking sheet, then freeze until solid. Once firm, transfer the pieces to an airtight container or freezer bag. This is great for toppings on ice cream, pies, or hot chocolate. Alternatively, freeze in bulk in a container, defrost in the fridge or at room temperature, then gently stir to aerate before using. For the best texture, use heavy cream and avoid over-whipping before freezing.
Serve This With


If you enjoyed learning How to Make Whipped Cream, please leave a 🌟 star rating and let me know how it went in the 📝 comments below!
How to Make Whipped Cream

Ingredients
Whipped Cream
- 1 cup heavy cream, or heavy whipping cream, cold
- ¼ cup powdered sugar
- ½ teaspoon pure vanilla extract
Instructions
For Hand-Mixed Whipped Cream
- Refrigerate a large metal bowl and whisk for 15 minutes before making the whipped cream.
- Add the heavy cream, powdered sugar, and vanilla to the chilled bowl. Slightly tilt the bowl and vigorously whisk until the desired peak stiffness is reached. For soft peaks about 4 minutes, for medium peaks 5 minutes, and stiff peaks 5 ½ minutes.
For Stand/Hand Mixer Whipped Cream
- In a stand mixer fitted with the whisk attachment, add the heavy cream, powdered sugar, and vanilla. Alternatively, if using a hand mixer, use the whisk or beaters attachment and a large bowl; whipping times may vary.Whip the mixture on medium-low speed (setting 4), until the cream is frothy with bubbles on the surface, 1 minute. Increase the speed to medium-high (setting 8) and whip until a fluffy, smooth consistency is reached, about 1 to 2 minutes for soft peaks. Stop at this point, or continue to whip in 5-second intervals until medium or stiff peaks form. Be careful, the consistency will change quickly.
For Blender Whipped Cream
- Add heavy cream, powdered sugar, and vanilla to the blender. Process on the lowest setting (variable speed 1 on a Vitamix) for 10 seconds. Immediately increase the speed to the highest setting (variable speed 10 on a Vitamix) and process until thickened, about 10 seconds. Immediately stop and check the stiffness, and gently stir. This should make soft peaks. If needed, process for an additional 5 seconds. Stop at this point or continue blending for 5-seconds for medium peaks and 10 additional seconds for stiff peaks.
For Food Processor Whipped Cream
- Add heavy cream, powdered sugar, and vanilla to the food processor. Process at high speed for 30 seconds, immediately stop to check the stiffness. This should give soft peaks. Stop here or continue processing for 5 seconds for medium peaks, 10 additional seconds for stiff peaks.
Recipe Video

Notes
- Recipe Yield: 2 cups
- Serving Size: ¼ cup
- When to Stop Whipping: For Soft Peaks – Looks like stirred yogurt and doesn’t hold a peak when lifted. For Medium Peaks – Looks like Cool Whip and peaks slightly when lifted. For Stiff Peaks – Looks like shaving foam and holds a peak when lifted.
- Less-Sweet Whipped Cream: Sugar can be reduced to 2 tablespoons.
- Sweetener Substitutes: Granulated sugar can be substituted for powdered sugar. Honey or maple syrup can be used, reduced to 2 tablespoons for the recipe.
- Storing: Store in an airtight container in the refrigerator for up to 2 days. Briefly whisk if water begins to weep from the cream or loses some volume.
- Freezing: Freeze in an airtight container for up to 1 month. Defrost at room temperature until the cream softens, can be stirred, and is still cold. This could take 15 to 45 minutes, depending on the batch size. Stir with a spoon to gently mix together before using.
Nutrition Facts
Percent Daily Values are based on a 2000-calorie diet. All nutritional information is based on estimated third-party calculations. Each recipe and nutritional value will vary depending on the brands you use, measuring methods, and portion sizes per household.


Cindy Kay Marlow says
What blade in a food processor?
Jessica Gavin says
I use the chopping blade to make whipped cream in the food processor.
Judy says
It is so helpful seeing the photos of whip cream stages from under beaten to over beaten. I will be using this for a topping on cake when I make something for my sister. She doesn’t like frosting and this is a great substitute I know she and anyone else will enjoy. You think of all those ‘extra’ recipes to share with us. I am always singing your praises and sending links to friends. I just ‘pinned’ your Apple Pie Nacho recipe.
Jessica Gavin says
You’re the best, Judy! I’m so happy that you find the pictures helpful for making whipped cream.