Stabilized whipped cream is the secret to fluffy, pipeable swirls that hold their shape for hours, not just minutes. With a simple gelatin technique, you can create a light, airy topping that stays beautifully firm for cakes, cupcakes, pies, and layered desserts.
Jessica’s Recipe Science
- Blooming gelatin in cold water hydrates the protein granules, dissolving evenly and forming a smooth stabilizing network.
- Whipping heavy cream to just below soft peaks before adding gelatin prevents overmixing and preserves delicate air bubbles.
- Powdered sugar dissolves fast and contains a small amount of starch, which helps absorb moisture and further stabilize the foam.
Why It Works
Whipped cream is a foam made by incorporating air into heavy cream. As you whisk, the milk fat partially coalesces, trapping air bubbles and creating structure. However, that structure is fragile. Over time, gravity and temperature cause the air cells to collapse and liquid to seep out, a process called syneresis. By dissolving unflavored gelatin and incorporating it at the soft peak stage, you reinforce the foam with a protein matrix that sets as it cools. This strengthens the whipped cream without making it dense or rubbery.
Home bakers should make stabilized whipped cream when preparing desserts in advance or when decorative piping requires sharp ridges. It’s especially helpful for frosted cakes, cream puffs, trifles, or any dessert that will sit out at room temperature for short periods. You still get the fresh dairy flavor and silky texture of regular whipped cream. It provides additional insurance against melting when transporting or storing a dessert.
Jump To a Section
Ingredients You’ll Need

- Cold Water: Hydrates and blooms the gelatin, allowing it to dissolve smoothly and disperse evenly into the cream.
- Unflavored Gelatin (Powdered): I use ½ teaspoon Knox gelatin per 1 cup of heavy cream. I tested 1 teaspoon of gelatin, but you lose that smooth meltability, and the gelatin leaves a film in your mouth. Gelatin forms a light protein network that stabilizes the whipped cream as it chills.
- Heavy Cream (or Heavy Whipping Cream): With at least 36% milk fat, it provides enough fat to trap air and create a stable foam.
- Powdered Sugar: Sweetens the cream and contains a small amount of cornstarch to help absorb excess moisture.
- Vanilla Extract: Enhances the natural sweetness and rounds out the dairy flavor without overpowering it.
See the recipe card below for all ingredients and measurements (US and metric).
Ingredient Substitutions
This stabilized whipped cream recipe is easy to customize! Try these delicious variations:
- Flavoring: Try maple, almond, lemon, coconut, or peppermint extract.
- Cocoa Powder: Add 1 to 2 tablespoons to make chocolate-stabilized whipped cream; sift first to prevent lumps.
- Sweetener Swap: Replace powdered sugar with granulated sugar. Try honey or maple syrup, though the texture may be slightly softer.
- Cream Cheese: Whip in 2 tablespoons of softened cream cheese for a tangier, thicker stabilized topping similar to a light frosting.
How to Stabilize Whipped Cream

Step 1: Prepare the Gelatin
Add cold water to a microwave-safe bowl and sprinkle the powdered gelatin evenly over the surface. Let it stand for 5 minutes. This blooming step hydrates the gelatin granules, allowing them to dissolve properly and preventing clumping. Microwave in 5-second increments until the gelatin fully dissolves, about 15 seconds total. The mixture should be fluid but not hot.
Tips for Perfect Execution: Slight cooling prevents the whipped cream’s fat structure from melting when it’s added. If it begins to solidify, gently reheat for 5 seconds.

Step 2: Whip the Cream
In a stand mixer fitted with a whisk attachment, combine heavy cream, powdered sugar, and vanilla extract. Start on low speed to create small, stable air bubbles. Gradually increase to medium speed and whip until you reach just below soft peaks. Alternatively, you can whisk by hand using a chilled bowl to maintain a lower temperature, which helps the fat trap air more efficiently.
Pro Tip: This controlled aeration allows the fat globules to partially coalesce and stabilize air without overworking the mixture.

Step 3: Incorporate the Gelatin
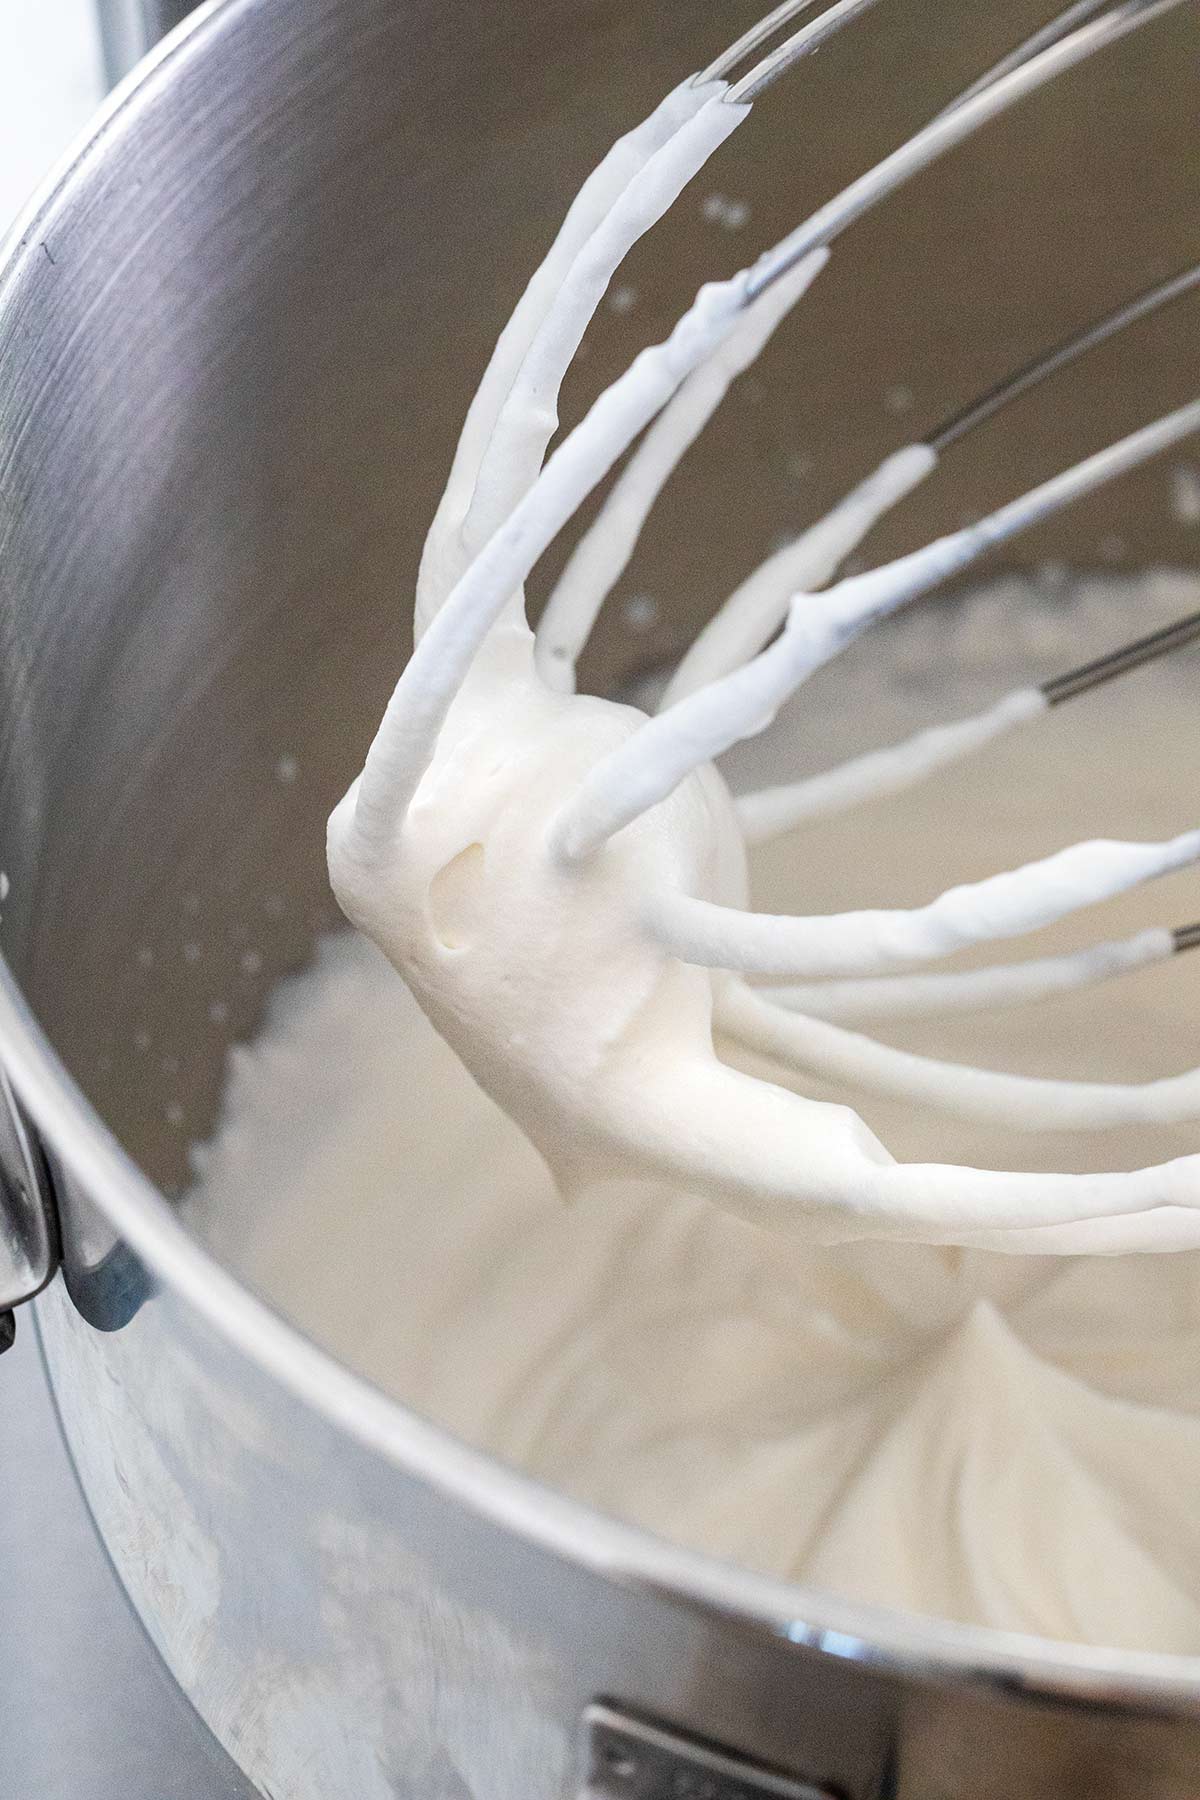
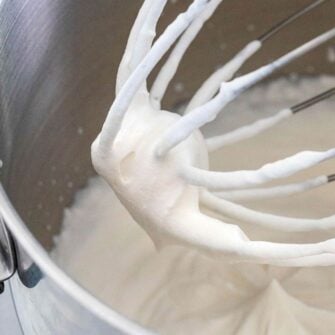
With the mixer running on medium speed, slowly pour in the dissolved gelatin. Adding it at the soft peak stage ensures it disperses evenly throughout the foam. Increase to medium-high speed and whip until the desired peaks form, about 30 to 60 seconds.

When the warm gelatin dissolves in the cream, it eventually solidifies as it cools, preventing the pockets from collapsing and losing volume. It also keeps the cream from weeping (fat separating from the water).
Storing Tips: Stabilized whipped cream lasts for 2 to 3 days. It’s great for layer cake, cookies, cupcake frostings, and pound cake toppings.

Frequently Asked Questions
To stabilize whipped cream, you add bloomed and dissolved unflavored gelatin. The melted gelatin is gently whisked into softly whipped cream, then whipped to the desired peaks. As it chills, the gelatin forms a light protein network, helping the cream hold its shape longer without collapsing or weeping.
Regular whipped cream relies solely on milk fat to trap air, so it’s light and fluffy but gradually deflates and may release liquid over time. Stabilized whipped cream contains an added ingredient, like gelatin, that forms a supportive protein network around the air bubbles, helping it hold its shape longer for piping, frosting, and make-ahead desserts.
When stabilized with gelatin, whipped cream can typically be stored in an airtight container in the refrigerator for 2 to 3 days. For the best texture and structure, use it within 24 to 48 hours, as the foam will gradually lose volume over time.
You can store the stabilized whipped cream in the freezer, but the texture may change slightly upon thawing. For best results, freeze piped shapes on a baking sheet, then transfer to an airtight container.
Use It On


If you tried this Stabilized Whipped Cream Recipe, please leave a 🌟 star rating and let me know how it went in the 📝 comments below!
Stabilized Whipped Cream
Ingredients
- 1 ½ tablespoons cold water
- ½ teaspoon unflavored gelatin, powdered
- 1 cup heavy cream, or heavy whipping cream
- ¼ cup powdered sugar
- ½ teaspoon vanilla extract
Instructions
- Prepare the Gelatin – Add water to a microwave-safe bowl, and sprinkle gelatin on top. Let the mixture stand for 5 minutes, and it will harden. Microwave the gelatin mixture on high power in 5-second increments until the gelatin dissolves, about 15 seconds total. Stir and allow to slightly cool, but not harden, before adding to the cream. If the gelatin solidifies, microwave for 5 seconds.
- Whip the Cream – In a stand mixer fitted with the whisk attachment, add cream, powdered sugar, and vanilla. Mix on low speed (setting 2) for 1 minute until bubbles form. Turn the speed to medium (setting 5) for about 2 minutes, until a trail of cream forms (just below soft peaks).Alternatively, make the stabilized whipped cream using a chilled bowl, then whisk until the desired peaks form.
- Incorporate the Gelatin – Slowly pour in the gelatin mixture, then increase speed to medium-high (setting 8) until desired peaks form, about 30 to 60 seconds.
Recipe Video

Notes
- Recipe Yield: 2 cups
- Serving Size: ¼ cup
- When to Stop Whipping: For Soft Peaks – Looks like stirred yogurt and doesn’t hold a peak when lifted. For Medium Peaks – Looks like Cool Whip and peaks slightly when lifted. For Stiff Peaks – Looks like shaving foam and holds a peak when lifted.
- Less-Sweet Whipped Cream: Sugar can be reduced to 2 tablespoons.
- Sweetener Substitutes: Granulated sugar can be substituted for powdered sugar. Honey or maple syrup can be used, reduced to 2 tablespoons for the recipe.
- Storing: Store in an airtight container in the refrigerator for up to 2 days. Briefly whisk if water begins to weep from the cream or loses some volume.
- Freezing: Freeze in an airtight container for up to 1 month. Defrost at room temperature until the cream softens, can be stirred, and is still cold. This could take 15 to 45 minutes, depending on the batch size. Stir with a spoon to gently mix together before using.
Nutrition Facts
Percent Daily Values are based on a 2000-calorie diet. All nutritional information is based on estimated third-party calculations. Each recipe and nutritional value will vary depending on the brands you use, measuring methods, and portion sizes per household.


Leave a Comment