
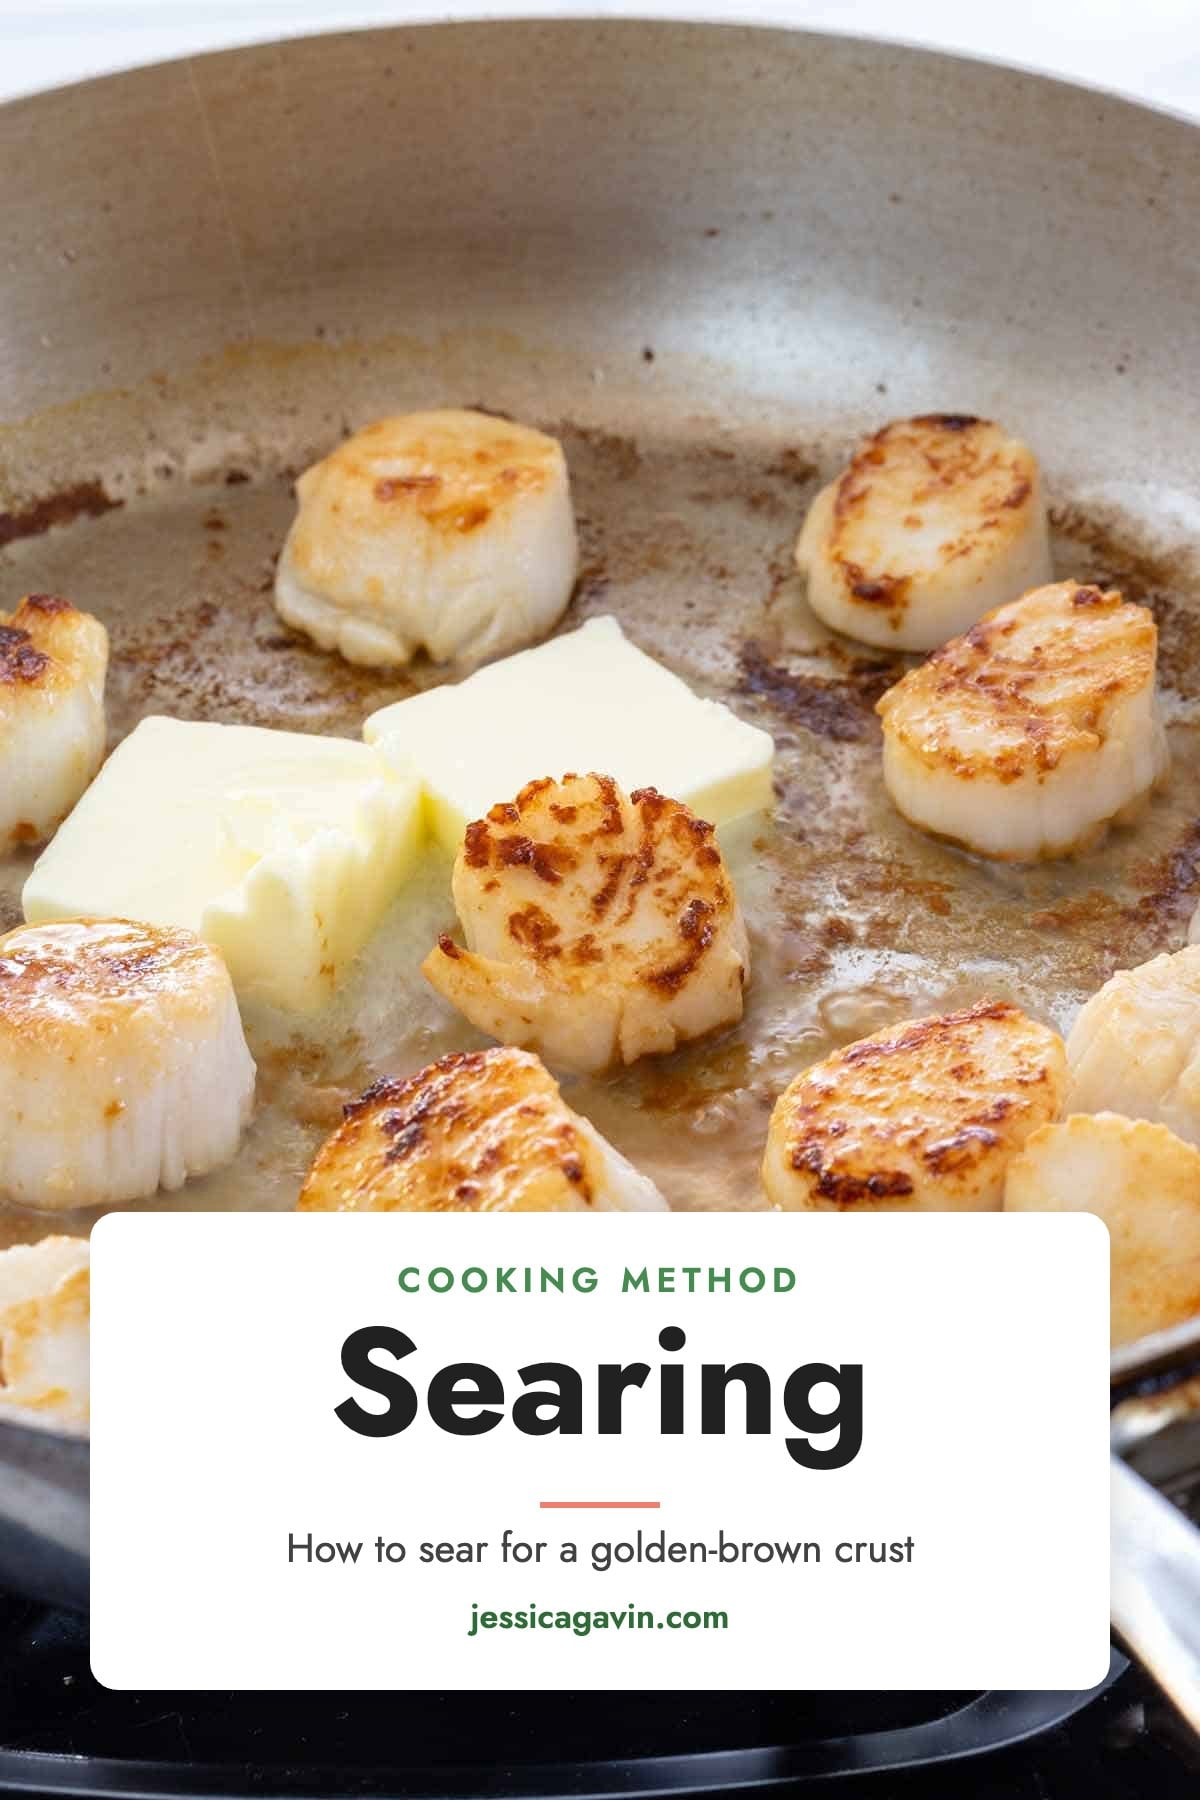
A deep golden-brown crust is what makes a steak, scallop, or salmon fillet taste so good. The searing cooking method browns the surface of food in a very hot pan with a little oil, building rich, savory flavor before the inside is cooked through. Here’s how searing works, which pan and oil to use, and the steps for a perfect crust every time.
Jessica’s Recipe Science
- Searing browns food through the Maillard reaction, which takes off once the surface reaches about 300ºF (149ºC).
- A dry surface sears faster, since any moisture has to evaporate before the food can start to brown.
- Searing builds flavor but doesn’t “lock in” juices, so cook to the right internal temperature and rest the meat to keep it juicy.
Jump To a Section
What is Searing?
Searing is a dry-heat cooking technique that browns the surface of meat, poultry, or seafood in a very hot pan with a small amount of oil. It usually takes just a few minutes per side. Thin cuts can cook all the way through in the pan, while thicker foods are often seared first and finished in the oven, over lower heat, or in a braise.
Searing is closely related to sautéing and pan frying, but it uses larger pieces that sit still in the pan to brown instead of being tossed. A reverse sear flips the usual order, cooking a thick steak gently in the oven first and searing it at the end.
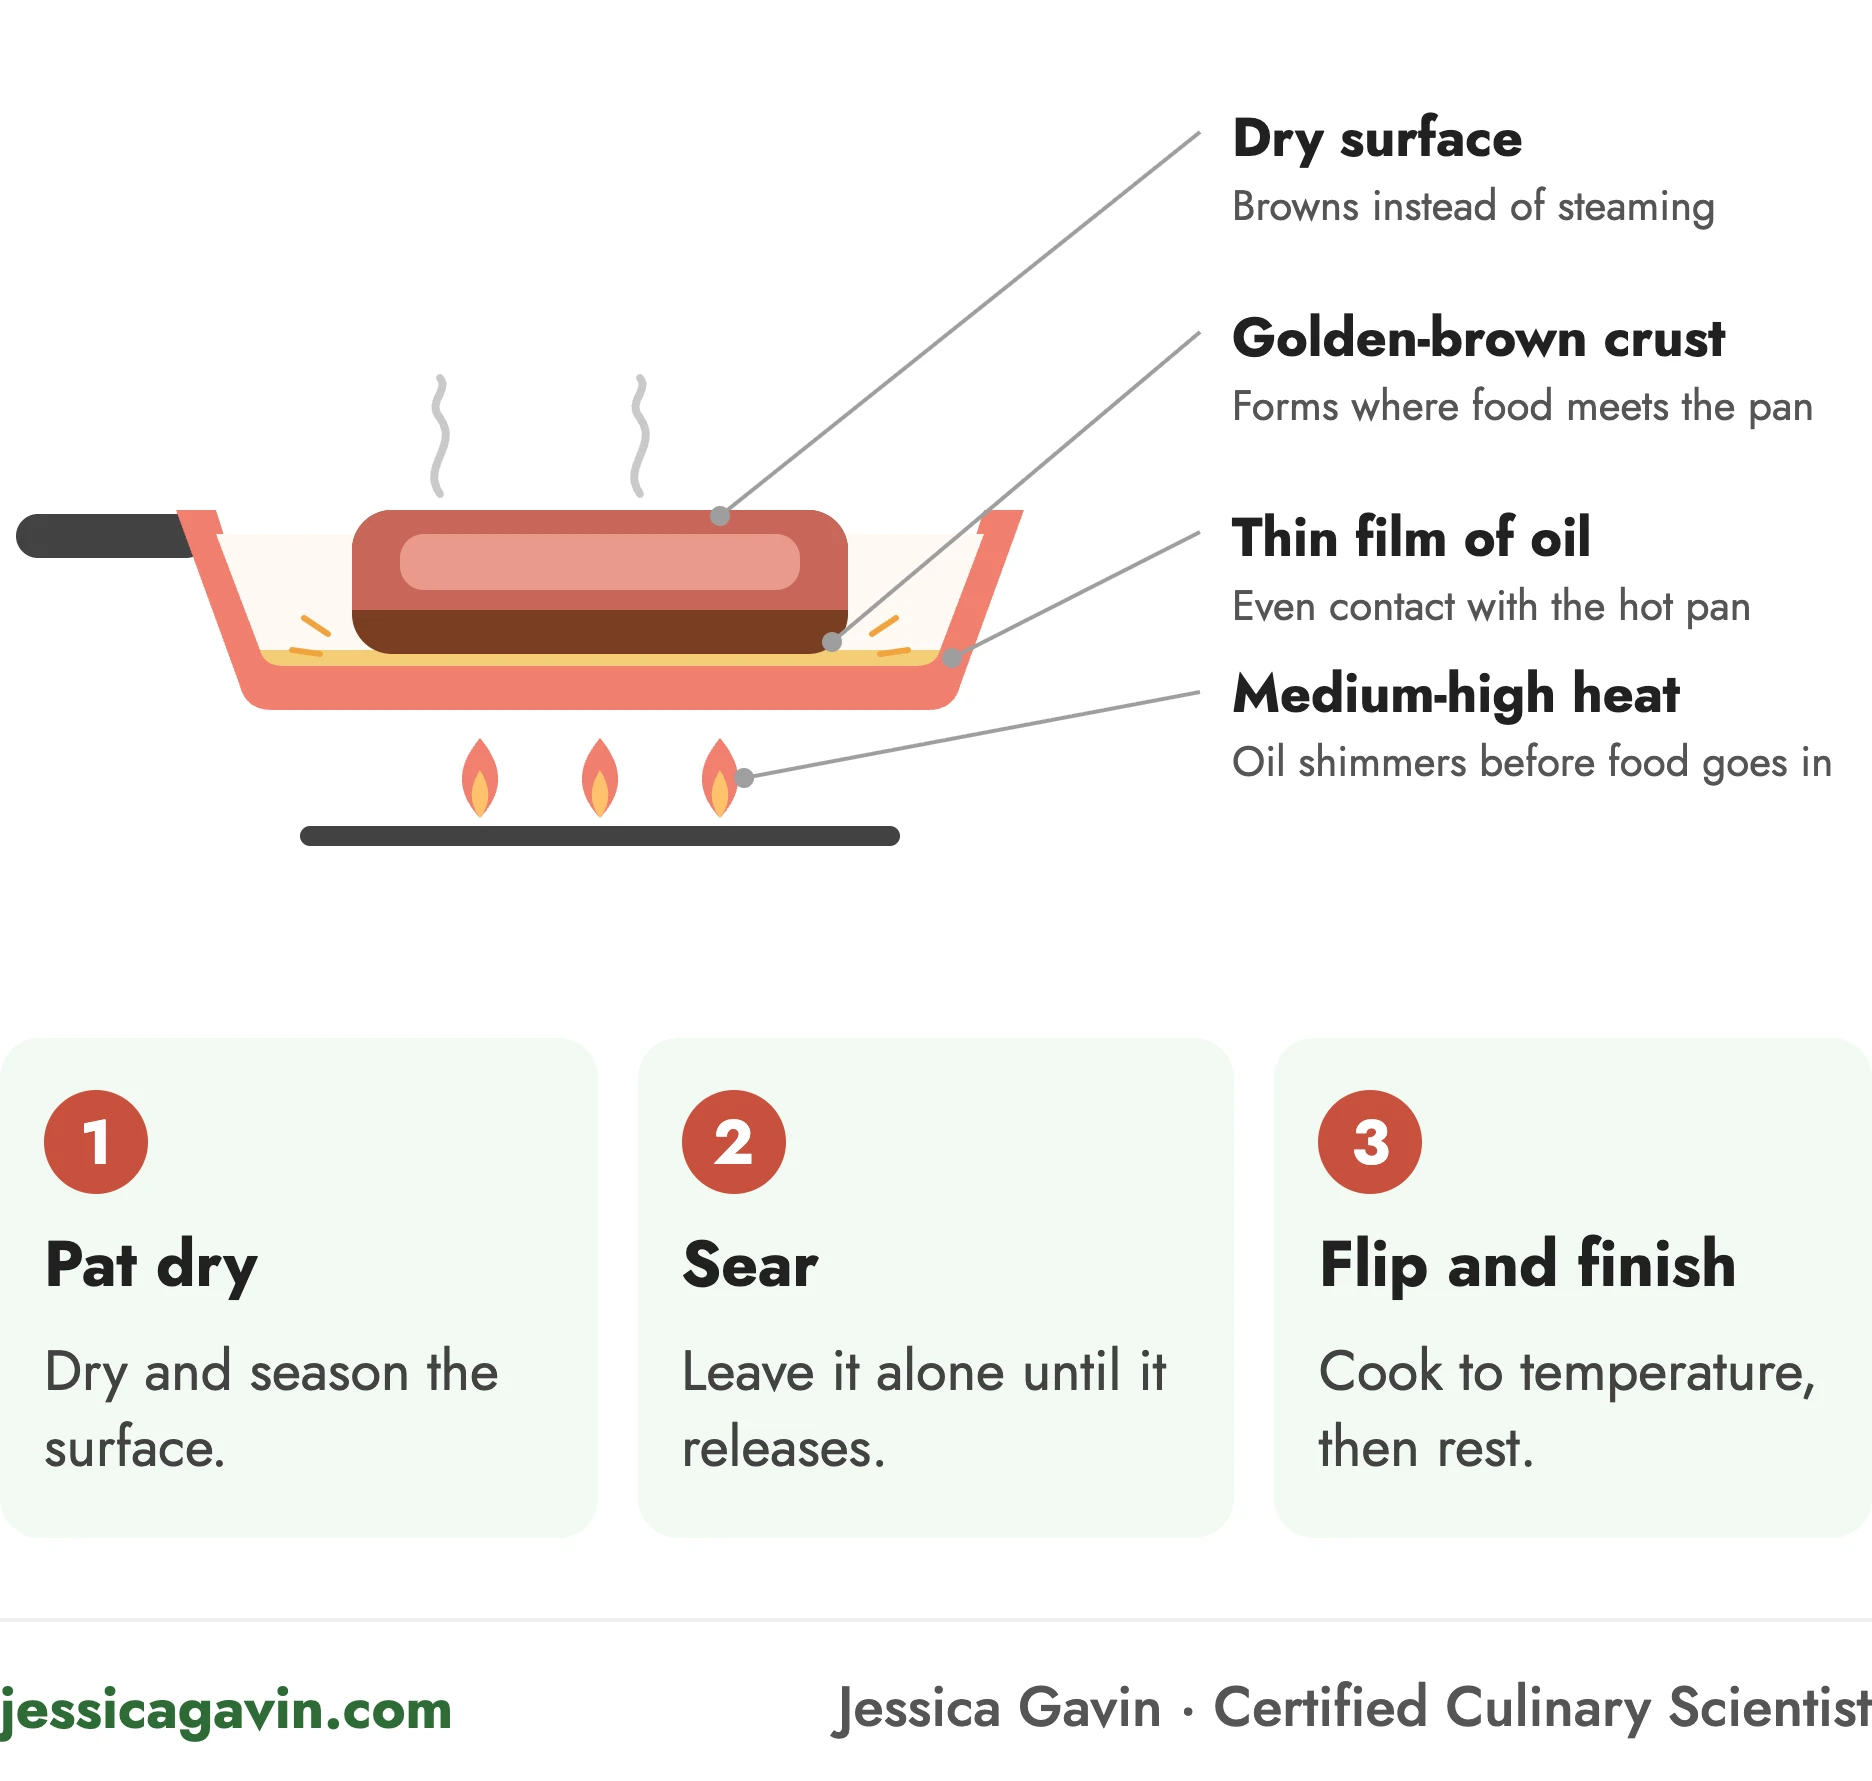
Searing at a Glance
| Factor | Details |
|---|---|
| Heat type | Dry heat (direct contact with a hot pan and a thin film of oil) |
| Heat level | Medium-high to high, with the oil shimmering before the food goes in |
| What happens | The surface browns through the Maillard reaction, forming a flavorful crust, while the inside stays less done |
| Best foods | Steaks, chops, chicken breasts and thighs, salmon, halibut, scallops, tuna, and roasts before braising |
| Typical time | About 1 to 3 minutes per side for tuna and scallops, and about 4 to 7 minutes per side for salmon, chicken, and steak |
| Equipment | A cast iron or stainless steel skillet, tongs or a fish spatula, and an instant-read thermometer |
How to Sear
These steps work for most seared meat, chicken, and seafood. Check your recipe for specific times and temperatures.
Pat Dry and Season
Pat the food completely dry with paper towels, since surface moisture turns to steam and slows browning. For scallops, buy dry-packed ones for the best crust. Letting steaks or fish stand briefly at room temperature before cooking helps them sear more evenly. Season generously with salt and pepper right before cooking.
Choose a Heavy Pan
Use a heavy cast iron or stainless steel skillet, which holds heat well and builds the best crust. A nonstick pan works for delicate fish, but it won’t brown quite as deeply. Pick a pan big enough to leave space around each piece.
Heat the Pan, Then the Oil
Preheat the pan over medium-high heat for a couple of minutes, then add a thin layer of oil with a high smoke point, like avocado, light olive, grapeseed, or vegetable oil. The pan is ready when the oil shimmers. For steaks and scallops, many of my recipes heat it until it just begins to smoke.
Lay It Down and Leave It

Place the food in the pan presentation side down, laying it away from you to avoid splatters. Don’t crowd the pan, which lowers the temperature and causes steaming. Gently press thin fillets so they make full contact with the pan, then leave the food alone so a crust can form.
Flip When It Releases

When the crust forms, the food releases from the pan on its own. If it sticks, give it another minute. Flip once and sear the other side. For thick steaks, use tongs to quickly sear the edges too.
Finish Cooking and Rest
Thin cuts like chicken breasts and scallops can cook through in the pan. For thicker foods, lower the heat or move the pan to the oven to finish. Use an instant-read thermometer: the USDA recommends 165ºF (74ºC) for chicken and 145ºF (63ºC) for fish and for beef, pork, and lamb steaks and chops, with a 3-minute rest. Many cooks prefer salmon and steak cooked to a lower temperature, like the 120ºF (49ºC) medium-rare in my Pan-Seared Salmon. Let meat rest a few minutes before slicing, and use the browned bits left in the pan to make a quick sauce.
Best Foods for Searing
Searing works best for tender cuts of meat, poultry, and seafood that taste great with a browned, savory crust.
Steak and Beef

Steaks about 1 inch thick can be seared all the way to medium-rare in the pan. For thicker steaks, the reverse sear gives you an even pink center with a crisp crust. Try my Reverse Sear Steak, Pan Seared Top Sirloin Steak, or Beef Wellington.
Chicken

Boneless chicken breasts and thighs develop a golden crust in a few minutes per side, then finish cooking over medium heat. Try my pan-seared chicken breast or Pesto Chicken.
Fish and Seafood

Salmon, halibut, scallops, and tuna sear quickly and stay tender inside. Dry them well, press fillets gently for even contact, and let them release before flipping. Try my Pan-Seared Salmon, Salmon Piccata, Pan Seared Halibut, Pan Seared Scallops, Scallops with Lemon Caper Pasta, or Seared Ahi Tuna.
Roasts Before Braising or Slow Cooking

Moist-heat cooking never gets hot enough to brown food, since it stays at or below 212ºF (100ºC). That’s why I always sear meat before braising or slow cooking, to add rich color and flavor. Try my Slow Cooker Pot Roast or Chicken Fricassee.
Advantages and Disadvantages of Searing
Advantages
- Big flavor: Browning creates a savory, golden crust.
- Fast: Most foods sear in just a few minutes per side.
- Built-in sauce: The browned bits in the pan make a quick pan sauce.
- Better color: A good sear makes braises and stews richer and more appealing.
Disadvantages
- Smoke and splatter: High heat and hot oil can smoke and pop.
- Easy to burn: Food can go from browned to bitter if the pan gets too hot.
- Not a complete method for thick cuts: Roasts and thick steaks need time in the oven or a braise.
- Needs a heavy pan: Thin pans lose heat and brown unevenly.
Recipes That Use Searing


Try searing with these reader favorites, or make my Sesame Crusted Ahi Tuna with Soy Ginger Sauce for a quick, restaurant-style dinner.
Frequently Asked Questions
Searing is a dry-heat technique that browns the surface of meat, poultry, or seafood in a very hot pan with a little oil. It creates a flavorful golden-brown crust through the Maillard reaction.
No. Searing doesn’t seal in juices. It builds a flavorful crust, but juiciness comes from cooking to the right internal temperature and letting the meat rest.
Both use a hot pan and a little oil. Searing browns larger pieces like steaks and fillets that sit still in the pan, while sautéing cooks smaller pieces that you toss or stir.
A heavy cast iron or stainless steel skillet holds heat well and builds the best crust. A nonstick pan works for delicate fish, but it won’t brown as deeply.
Use an oil with a high smoke point, like avocado, light olive, grapeseed, or vegetable oil. Butter can be added near the end for flavor and basting.
Reverse searing cooks a thick steak gently in a low oven first, then sears it in a very hot pan at the end. It gives an even pink center with a crisp crust.
Tools for Searing
- Cast iron skillet: Holds intense heat for a deep, even crust.
- Stainless steel skillet: Browns well and builds flavorful bits for a pan sauce.
- Tongs: Flip food and sear the edges of thick steaks.
- Instant-read thermometer: The best way to know when meat and fish are done.
Find all of my favorite kitchen tools on my Shop page.
Some of the links above are affiliate links, which pay me a small commission for my referral at no extra cost to you! Thank you for supporting my website.
Sources: USDA Food Safety (safe cooking temperatures).
More Cooking Method Guides
Learn how each technique works and when to use it, or start with the types of cooking methods overview:
Moist heat: Poaching · Simmering · Boiling · Steaming · Blanching
Combination heat: Braising · Stewing
Dry heat: Roasting · Baking · Sautéing · Pan Frying · Stir Frying · Deep Frying · Grilling · Broiling · Searing




Leave a Comment