
This baked apple recipe is a stunning dessert loaded with fall flavors that everyone will love! Perfect for serving with ice cream and crunchy pecans.

Jessica’s Recipe Science
- Use Honeycrisp, Fuji, or Granny Smith apples for baking because they hold their structure well. If the apple becomes too soft, the cell walls won’t hold, and the juice will break through the flesh.
- Apples are 86% moisture and can burst when baked. To prevent this, peel some skin from the top to let steam escape.
- Use rolled oats for a hearty, chewy, granola filling. Combine with butter, brown sugar, and cinnamon for a caramel-like flavor.
Jump To a Section
Why It Works
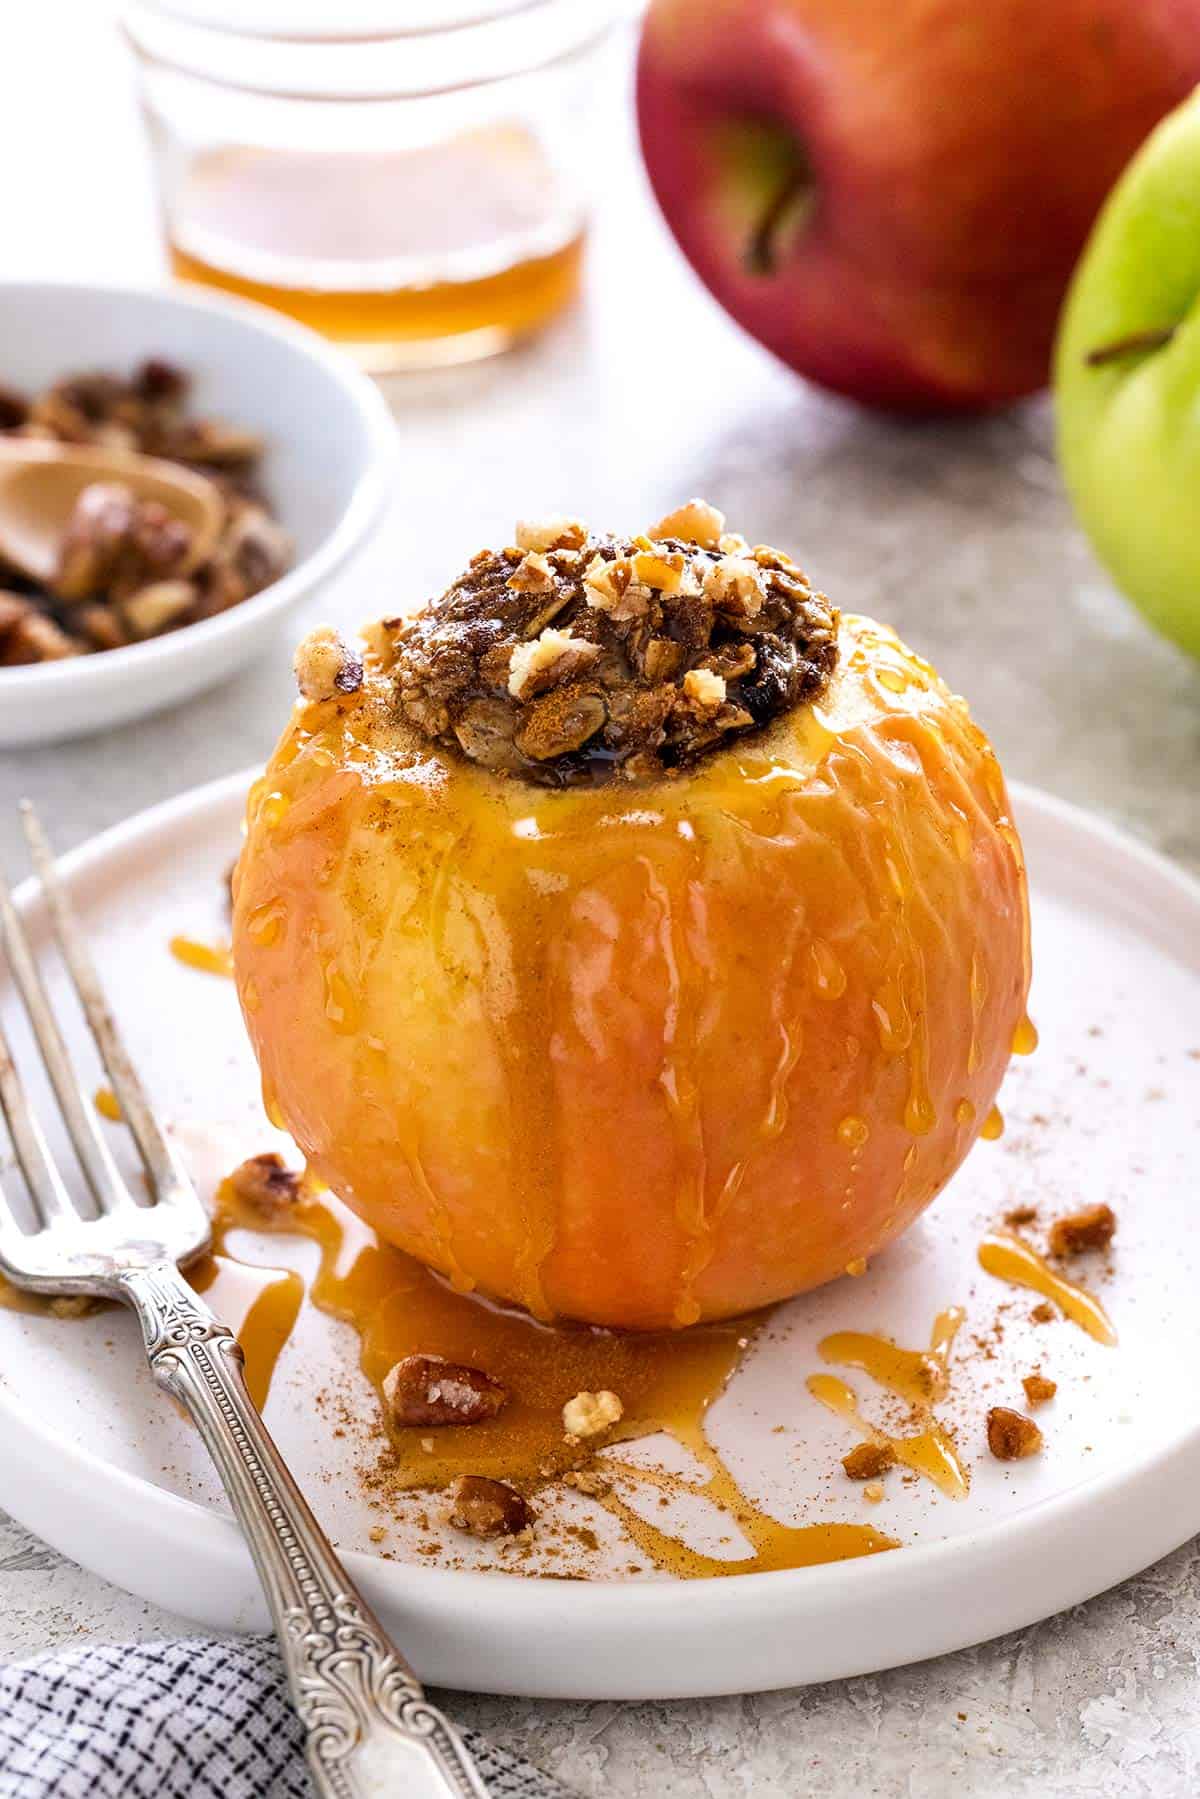
When autumn hits, it’s time to bake! My family enjoys it when I make a warm apple crisp or homemade apple pie from scratch. However, there’s an even faster and simpler way to enjoy this seasonal fruit. Fill it with a crunchy granola mixture, then bake until tender.
The process is straightforward! Remove the core and seeds, stuff them with a hearty oat mixture, then bake. In just an hour, you’ll have a warm apple dessert to enjoy. Serve à la mode with a scoop of vanilla ice cream, drizzle on caramel sauce, and sprinkle on chopped pecans for a festive fall treat.
Ingredients You’ll Need
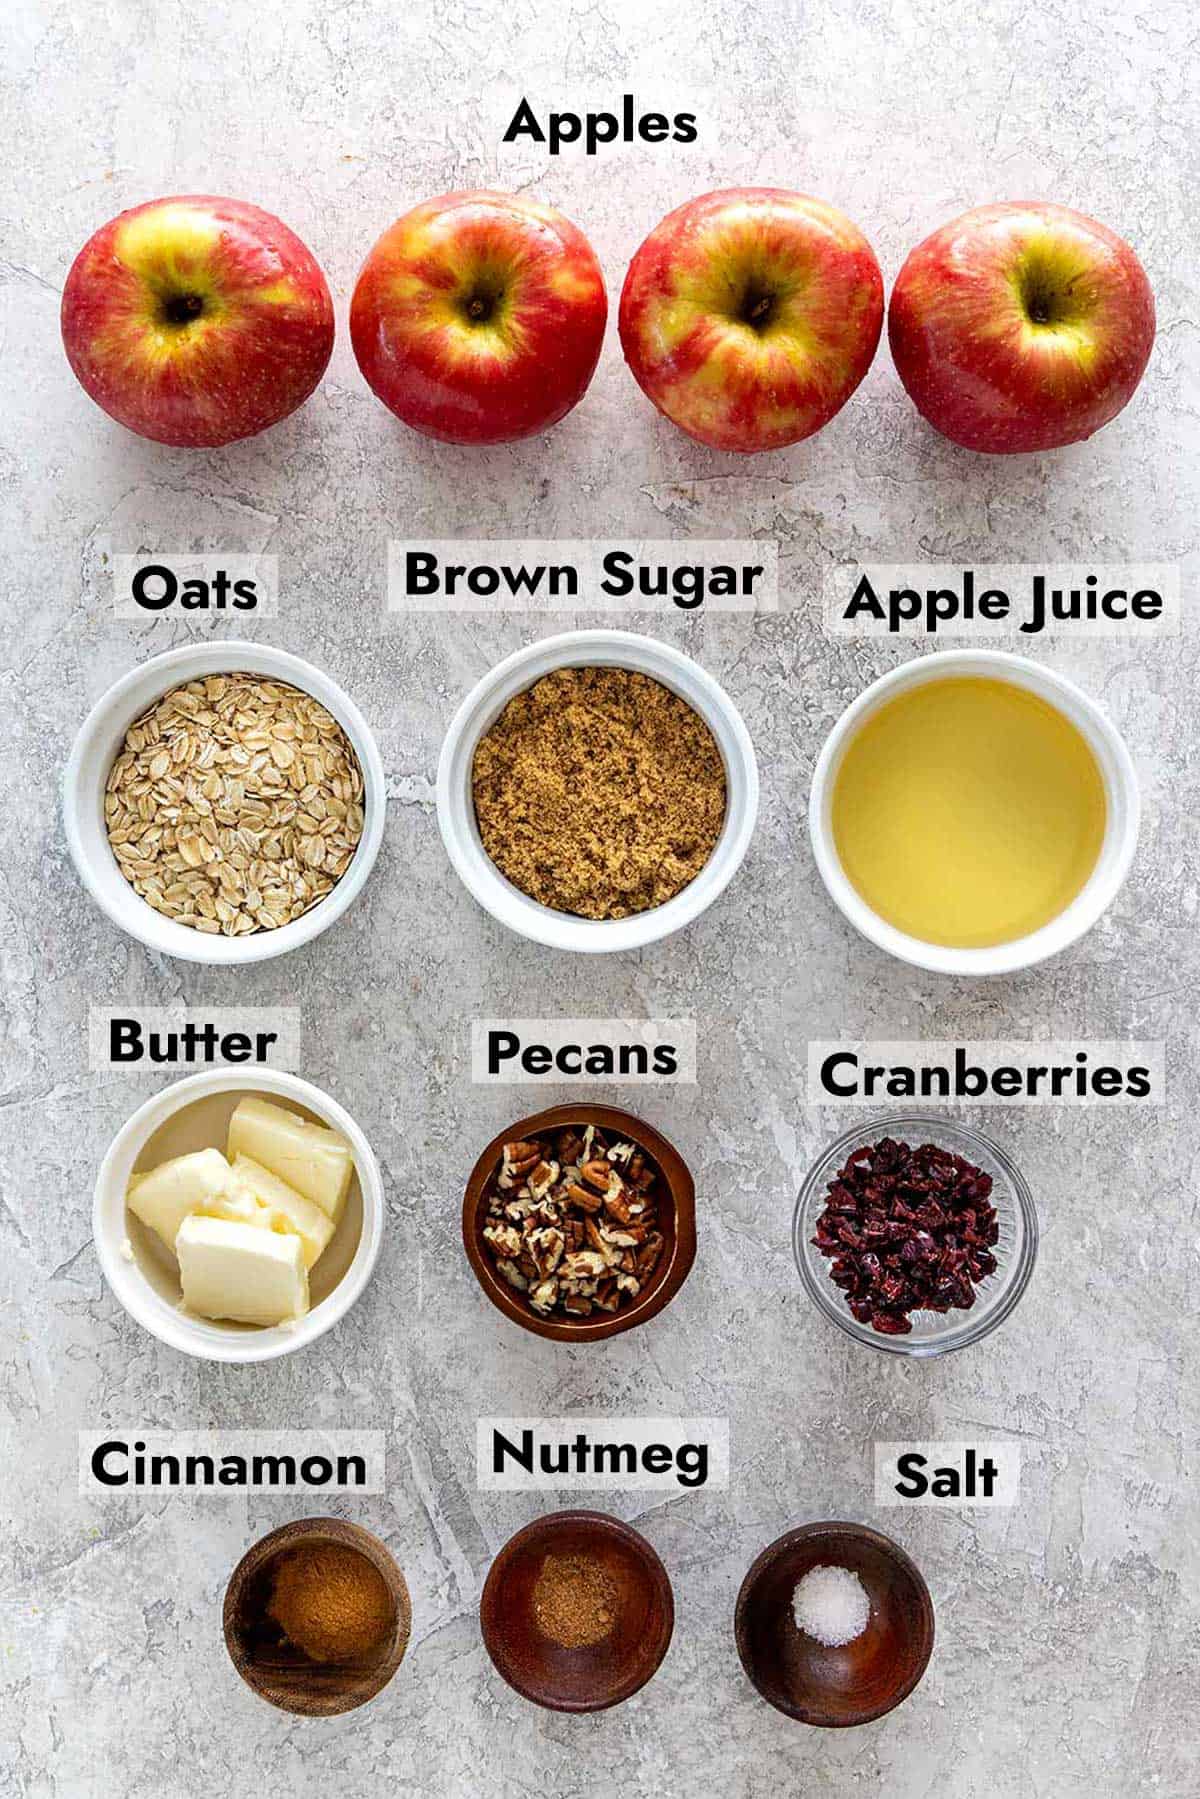
- Apples: The best cooking apples are Honeycrisp or Fuji if you like a balanced sweetness and acidity. Use Granny Smith apples if you prefer a more tart flavor to complement the sweet filling. They hold their structure, but the flesh softens when cooked. Select large apples about 7 to 8 ounces in size, and about 3 to 3 ¾ inches wide from the top.
- Oats: Use hearty rolled oats as the base of the filling. The thicker grains adds a pleasant chew, plus extra fiber for a satisfying sweet treat.
- Butter: Softened butter helps the filling compact together when stuffing the apples.
- Brown Sugar: The molasses in the sugar adds a caramel flavor to the filling.
- Seasoning: Warm spices like ground cinnamon and nutmeg enhance the sweet baked aroma and taste. Salt helps to balance the sugars in the recipe.
- Nuts: Chopped pecans add a crunchy texture to the filling.
- Fruit: Dried cranberries add a burst of sweet and tangy flavor, plus a delicious chewy texture.
- Liquid: Adding liquid like apple juice to the pan before baking the apples prevents the bottom of the dish from burning. The steam also helps to tenderize the flesh quickly.
See the recipe card below for all ingredients and measurements (US and metric).
Ingredient Substitutions
This easy baked apple recipe is great for customizing! Try these delicious options:
- Apple Substitutes: Other types of apples, such as Pink Lady, Gala, Braeburn, or Golden Delicious are other good options. Avoid red delicious apples because they become mealy when baked.
- Sweetener Swaps: You can switch the sweetener with honey, maple syrup, or coconut sugar.
- Seasoning: Add my apple pie spice, which includes cinnamon, nutmeg, cloves, and allspice.
- Nuts: Almonds, cashews, walnuts, and shredded coconut are great nutty substitutes.
- Dried Fruit: Swap dried cranberries for raisins, golden raisins, dried figs, dates, or cherries.
- Oat Options: You could also use instant oats, but they will be softer in texture. For any dietary restrictions, use gluten-free oats.
- Butter Swap: Use coconut oil, avocado oil, or olive oil. These liquid fats make the filling less compact and slightly crumbly.
How to Make Baked Apples
Step 1: Preheat the Oven
Set your oven rack to the middle position and preheat to 375ºF (191ºC). This position ensures even heat distribution, allowing your dish to cook uniformly. Proper preheating is crucial as it stabilizes the oven temperature, ensuring consistent results.

Step 2: Make the Filling
Combine with softened butter and dark brown sugar for a caramel-like flavor. The recipe requires about 1 cup and ¼ cup of filling per apple.

The granola filling is a hearty, sweet filling that gives a texture that contrasts with the soft apples. Similar to my apple crisp, I use rolled oats. They hold their flaky shape to give a nice chew.

Step 3: Core the Apples
Once you know how to cut an apple, start by removing the stem, core, and seeds to fill the apple’s center. A large melon baller works well to scoop out those parts. A small measuring spoon or paring knife could also hollow out the center.
Ensure you don’t scoop through to the bottom of the apple blossom. I make a 1 1/2-inch hole on top of the apple and go down about ¾ of the way so that ¼ cup of filling can fit.

Step 4: Create a Vent
When baked, the apple skin can burst due to the steam building up in the flesh. To prevent this, peel off just the top 1/2-inch of skin around the edge of the opening to allow for steam to escape.
Expert Tip: To reduce apple browning of the exposed flesh, brush with water, apple juice, or lemon juice.

Step 5: Fill Each Apple
Add the filling mixture to each cored apple, about 3 to 4 tablespoons, lightly packing it. Ensure the mixture fills the apple to the top.
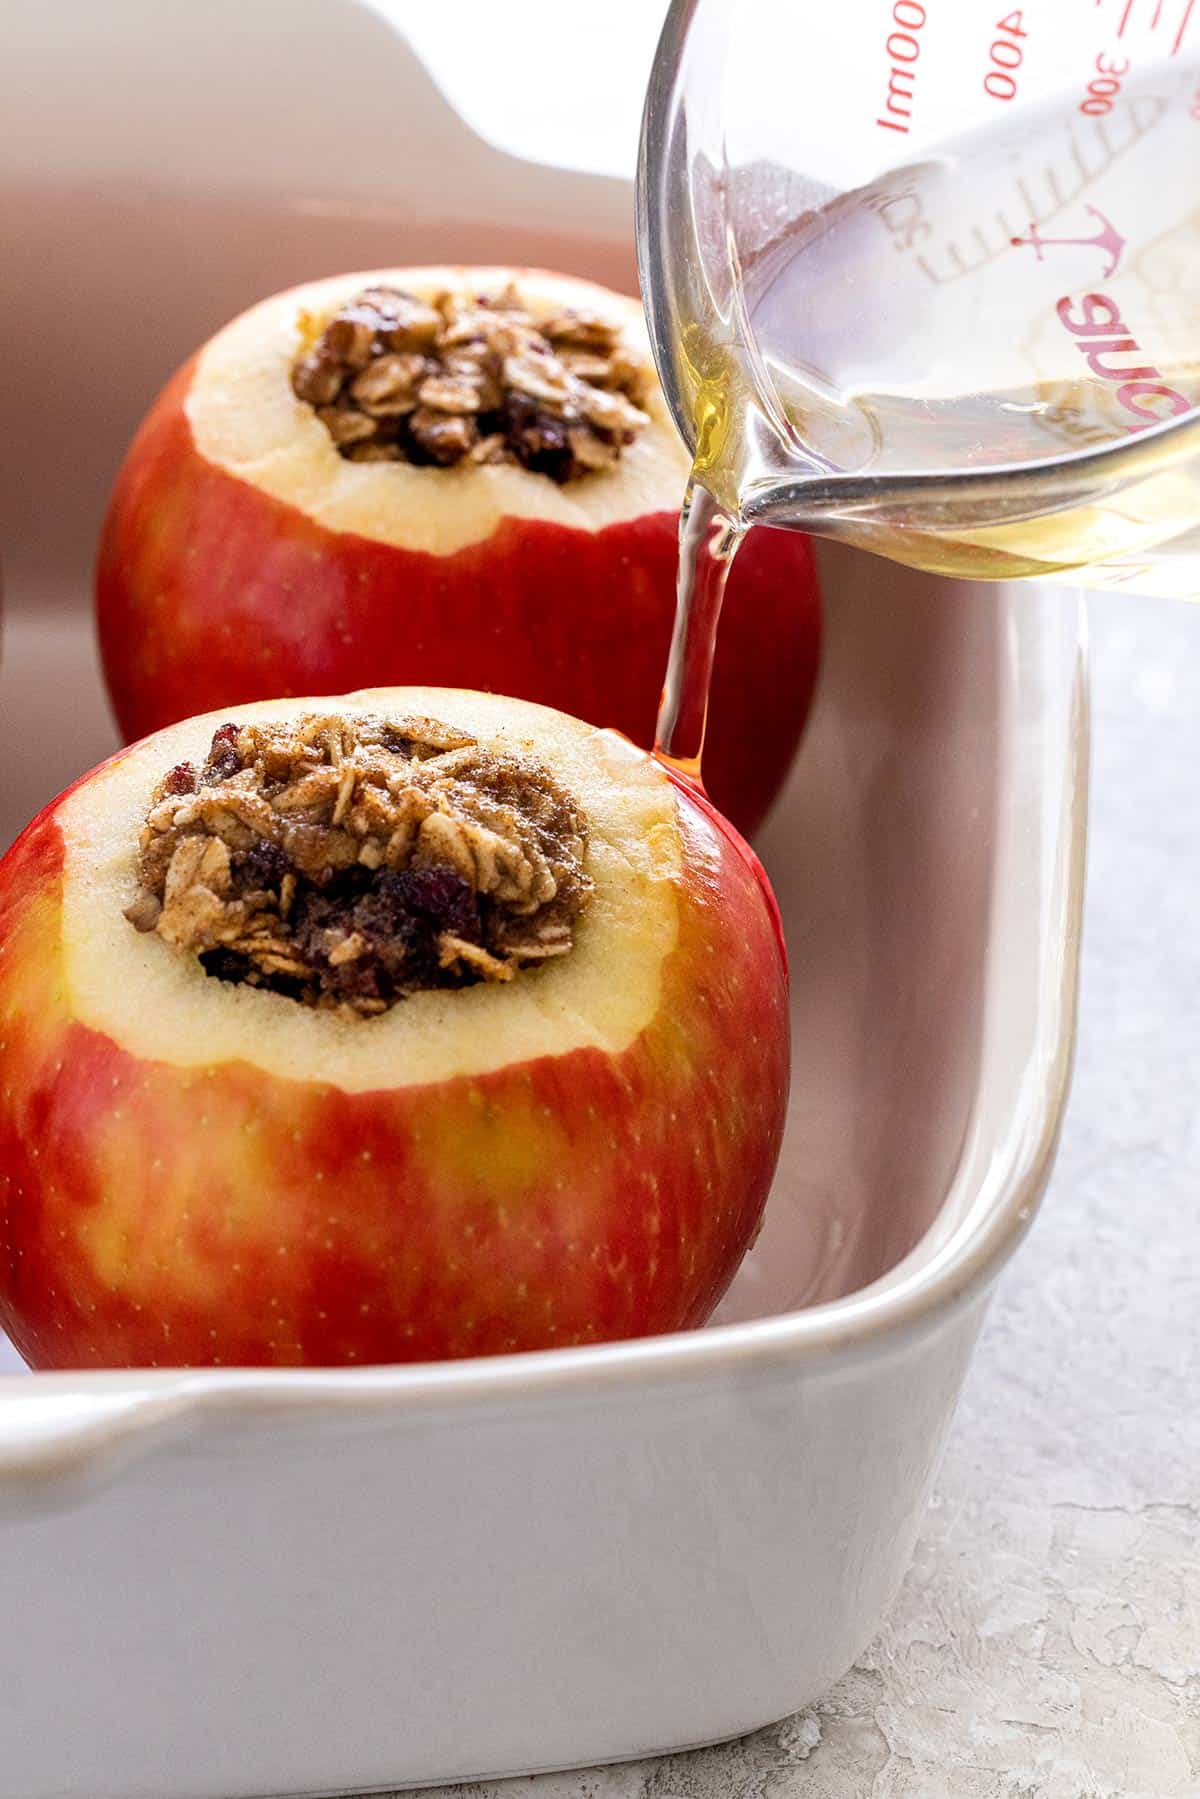
Step 6: Prepare the Baking Dish
Place the apples in an 8-inch square baking dish. You could also use a pie dish or cast iron skillet. Fill it with apple juice, apple cider, or water at the bottom of the pan. The small amount of moisture prevents burning and keeps the skin dewy, so they don’t dry up and burst. If it concentrates enough, it makes a light syrup pour on top.
Step 7: Bake the Apples
Bake at 375ºF (191ºC) until tender enough when pierced with a paring knife. The baking time will depend on how large the apples are and how soft you like the texture. For about 7 ½ ounce apples, after 40 minutes, they will soften on the edges and be slightly crisp but warm near the center. The flesh should register between 160 to 170ºF (74 to 77ºC). The surface of the granola filling should be dry and crisp.
Ingredient Chemistry: Around 183°F (84°C), the pectin in the apple’s cell walls begins to break down, creating a mushy apple. Stop baking before this point. I recommend stopping around 170ºF (77ºC) if you want the apple soft but still sliceable. Use a knife to test, and insert an instant-read thermometer to check the flesh.
Frequently Asked Questions
Apple crumble filling creates a crunchy pebble texture on top of the added flour. For a grain-free filling, add all nuts instead of oats. Diced apples can be mixed into the filling for an apple pie taste.
For stuffed baked apples, peel a small area near the opening where you will add the filling to create a vent in the flesh for steam to escape and prevent bursting. You can peel the entire apple before filling and baking—brush water on the surface to reduce browning and bake a few minutes less.
The apples taste best when served fresh from the oven. However, the filling can be made two days in advance and refrigerated. It’s best to core the apples the same day to prevent browning on the exposed flesh. Baked apples can be made three days in advance and reheated in the oven or microwave until warm.
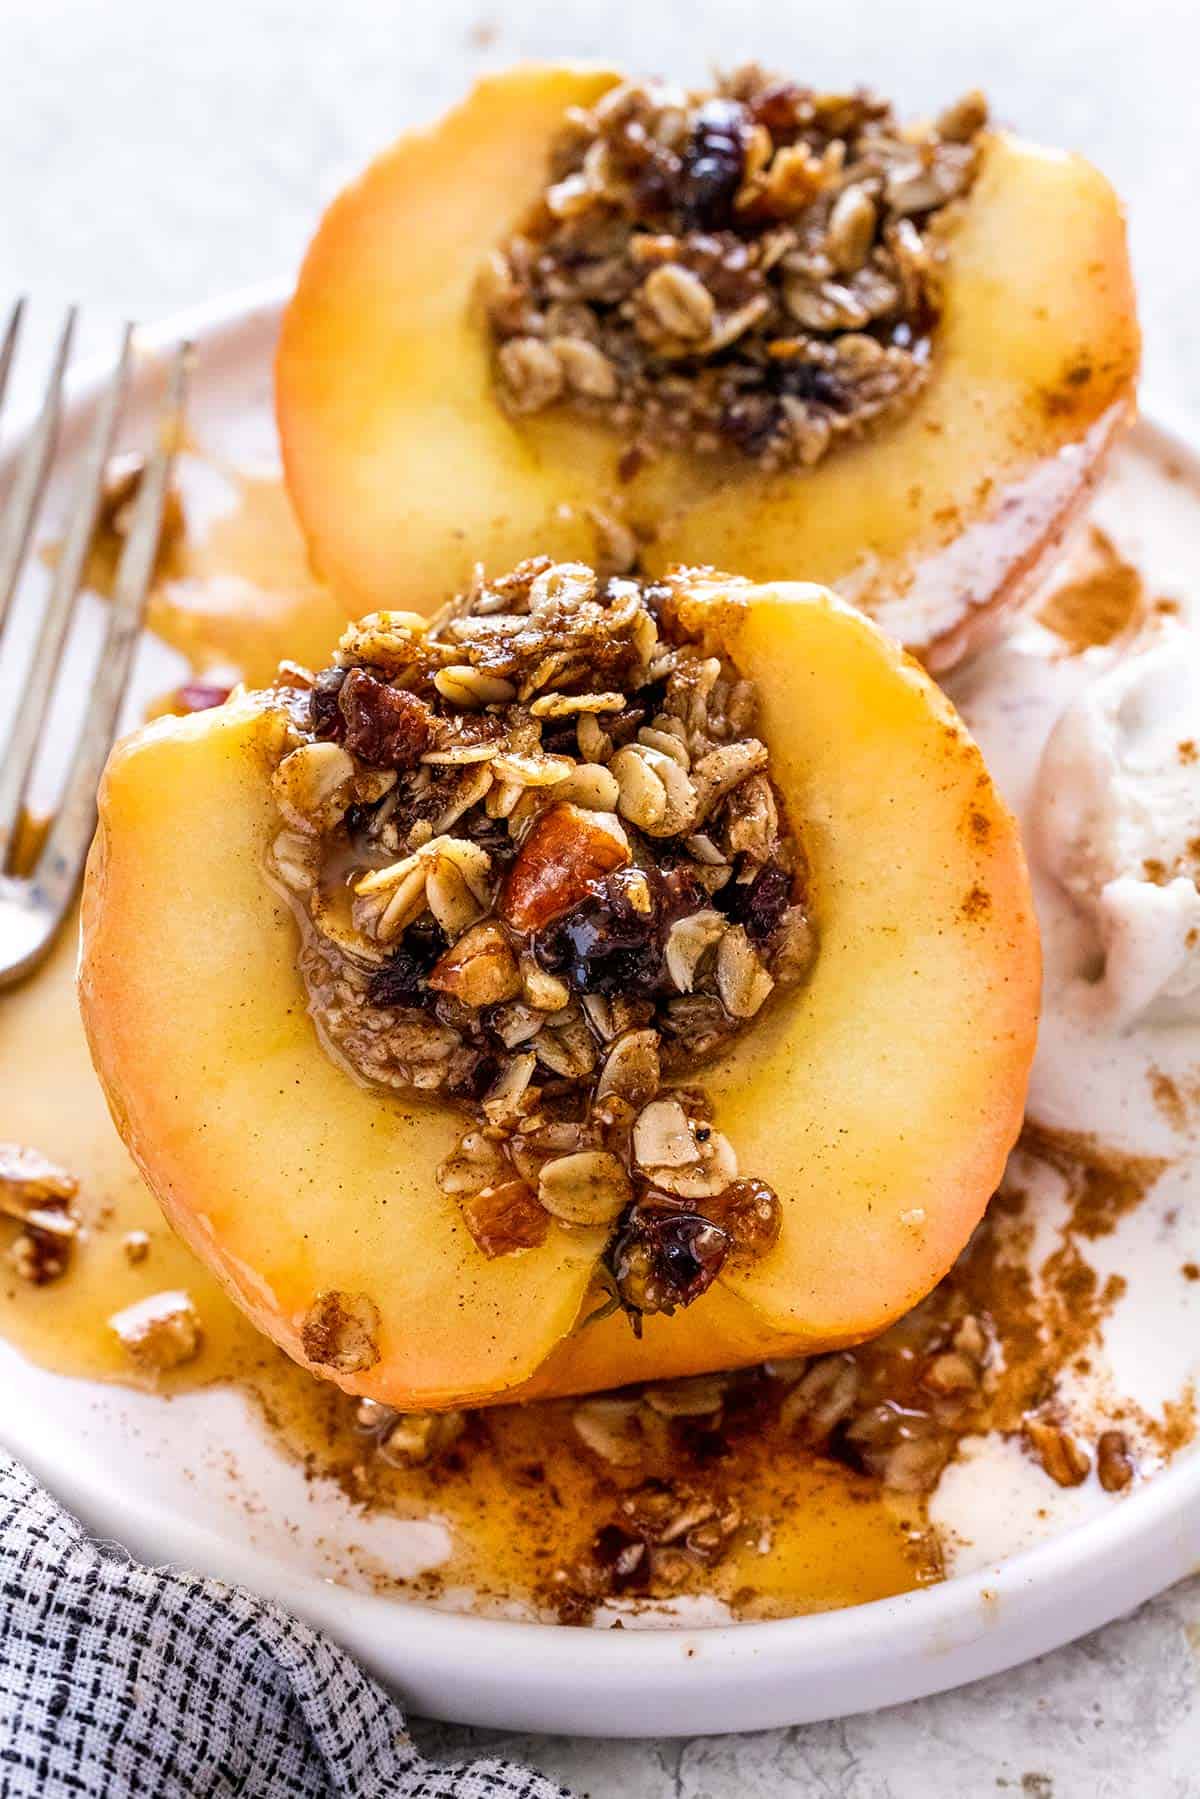
Yes! You can cut the apples in half to create two equal pieces, then remove the core to make space for the filling. Add about 2 tablespoons to the center. Then bake until the apples are tender and the granola is crisp. Check after 20 minutes since the apple is in smaller pieces.
Apples are composed of over 86% moisture. During baking, the juices inside start to bubble and steam. If the apple becomes too soft and mushy, the cell walls won’t hold its structure, and the juice will break through the flesh. Apples like Honeycrisp, Fuji, or Granny Smith hold their structure well. Plus, creating a vent on top by peeling away some of the skin also helps to prevent bursting.
Serve This With


If you tried this Baked Apples Recipe, please leave a 🌟 star rating and let me know how it went in the 📝 comments below!
Baked Apples

Ingredients
- 4 tablespoons unsalted butter, softened
- ½ cup old-fashioned rolled oats
- ¼ cup dark brown sugar, packed
- 1 teaspoon ground cinnamon
- ¼ teaspoon ground nutmeg
- ¼ teaspoon kosher salt, or sea salt
- 2 tablespoons chopped pecans, optional
- 2 tablespoon dried cranberries , or raisins, chopped, optional
- 4 large apples, Honey crisp, Granny Smith, or Fuji, 7 to 8 ounces each
- ¾ cup apple juice, apple cider, or water
Instructions
- Preheat the Oven – Set the oven rack to the middle position. Heat oven to 375ºF (191ºC).
- Make the Filling – In a medium bowl, combine softened butter, oats, brown sugar, cinnamon, nutmeg, salt, pecans, and cranberries.
- Core the Apples – Rinse and dry the apples. If the apples are not standing upright, thinly slice the bottom blossom end until it sits flat. Starting at the stem, use a large melon baller, a small measuring spoon, or a paring knife to remove the core and seeds to create a hollow center that fits ¼ cup of filling. Do not cut through the bottom of the apple. Make the opening on the top about 1 to 1 ½-inch wide. Leave about a ½-inch perimeter on the top.
- Create a Vent – Use a paring knife or peeler to remove about ½-inch of the skin from the top of the apple around the edges of the opening to prevent bursting. Brush the top of the flesh with apple juice or water to reduce browning.
- Fill Each Apple – Add the filling mixture to each cored apple, about 3 to 4 tablespoons, lightly packing. It should fill to the top.
- Prepare Baking Dish – Add the filled apples to an 8-inch square baking dish, or cast iron skillet. Heat the apple juice in 10-second intervals in the microwave until warm, about 100ºF (38ºC). Pour the warm juice around the apples. If using a larger pan, add enough juice to cover ¼-inch of the bottom.
- Bake the Apples – Bake until the apples pierce easily with a paring knife, about 40 to 50 minutes. For a soft and sliceable texture, the internal temperature should reach between 165 to 170ºF (74 to 77ºC). If desired, baste the apples with the juice on the bottom of the pan.
Recipe Video

Notes
- Filling Yield: About 1 cup, or a ¼ cup per apple.
- Apple Size: Large apples are about 3 to 3 ¾ inches and about 7 to 8 ounces in weight. Adjust baking time for small and medium apples.
- Omitting Nuts or Dried Fruit: Replace them with more oats.
- Storing: Store in an airtight container in the refrigerator for up to 3 days.
- Reheating: Place one apple at a time on a microwave-safe dish. Reheat in 15-second intervals until warm. Alternatively, reheat in the oven at 350ºF (177ºC) until warm, about 10 to 15 minutes.
- Make it Gluten-Free: Make sure to purchase gluten-free rolled oats.
- Make it Vegan: Use coconut oil or margarine instead of butter.
Nutrition Facts
Percent Daily Values are based on a 2000-calorie diet. All nutritional information is based on estimated third-party calculations. Each recipe and nutritional value will vary depending on the brands you use, measuring methods, and portion sizes per household.


Leave a Comment